Tiếng Việt
Sign up for a Bitget account
| Date: 29/10/2025 | 1978 Views | Cryptocurrency Exchange Registration |

Sign up for a Bitget account – Enjoy the diversity of financial instruments
Hello folks, it’s Tradevietstock again! Today, I’ll walk you through how to sign up for a Bitget account, your first step before diving into the world of crypto investing and trading.
In this tutorial, you’ll learn everything from the initial sign-up process, through account verification, and finally, how to make the first deposit on Bitget trading account, using P2P trading. Let’s get started!
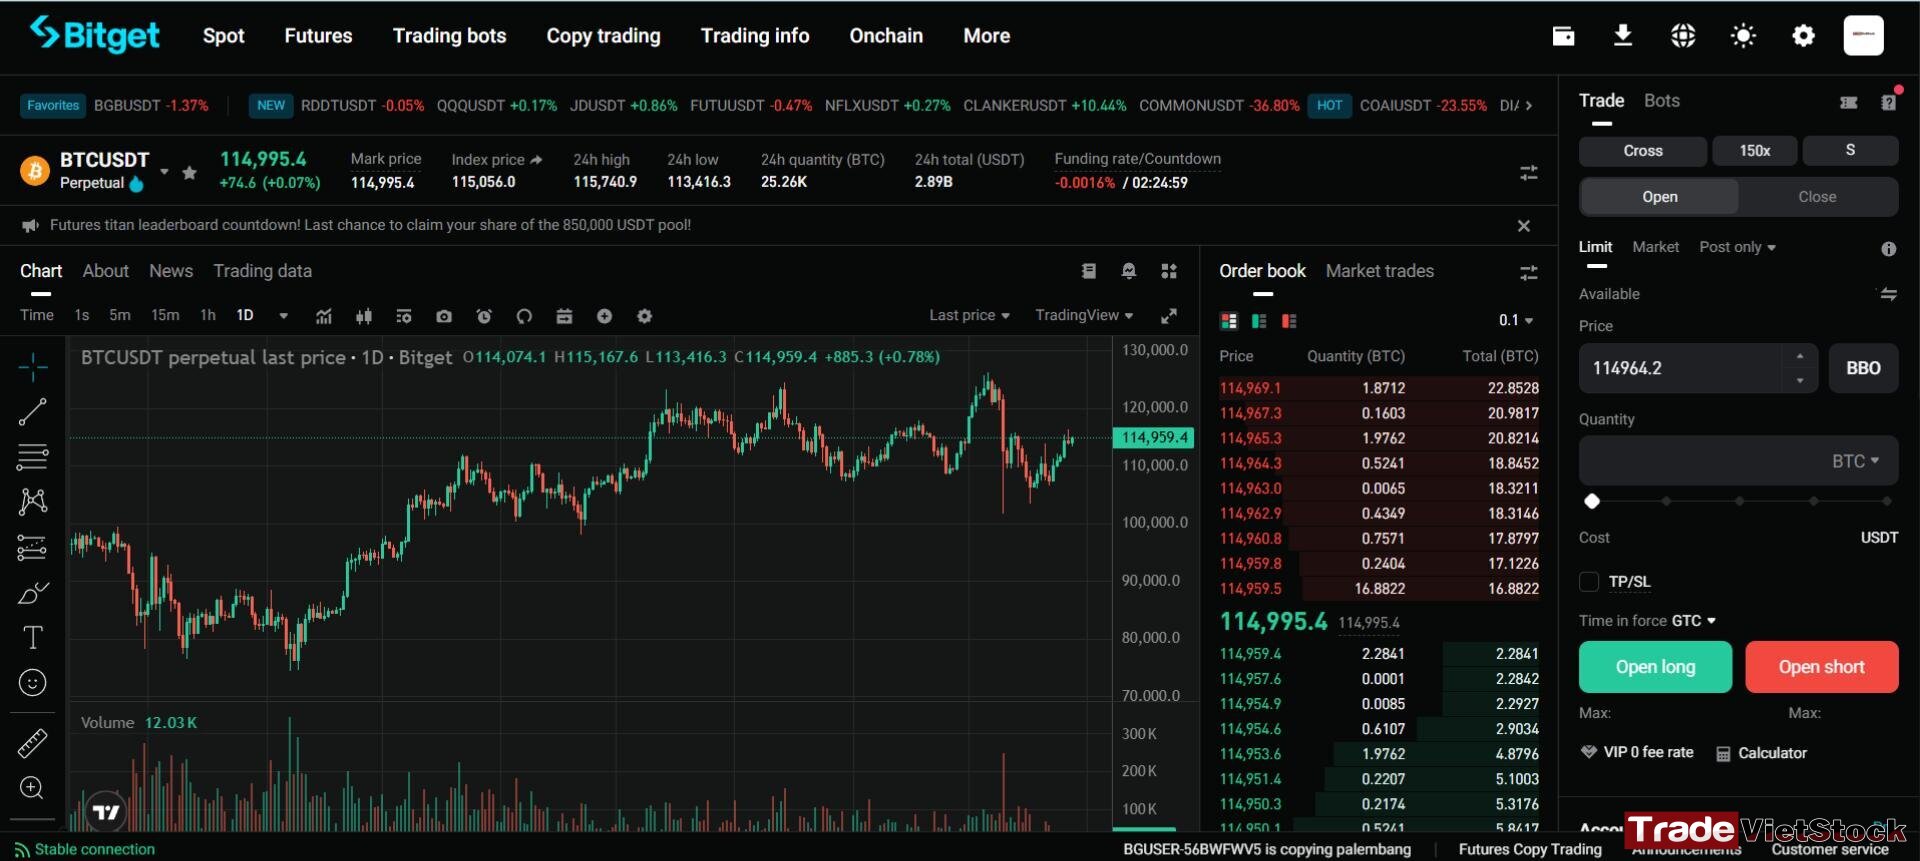
i. Bitget Registration Step by Step: Sign-Up
Step 1: Sign up for a Bitget account by clicking HERE
Enter your email address and password in the registration form.
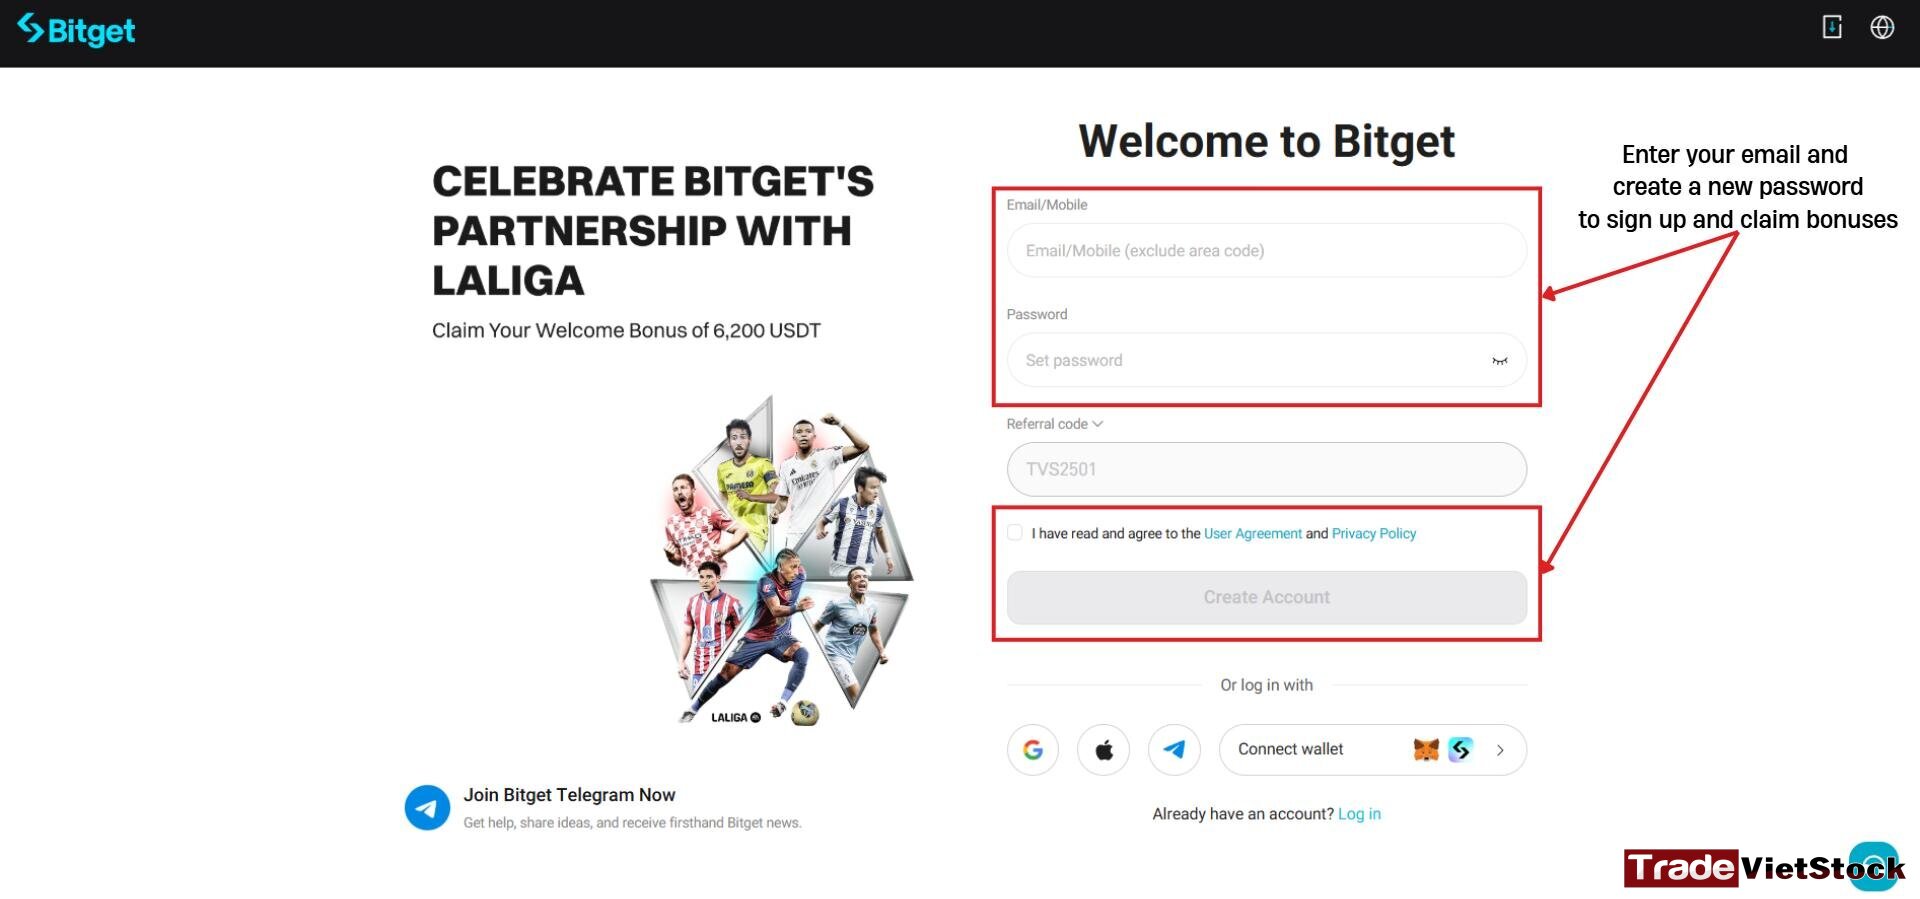
When setting your password, make sure it includes at least one uppercase letter and one number for stronger security.
Step 2: Enter your confirmation code
After creating your password, Bitget will send a confirmation code to your registered email address.
Enter that code to verify your email and proceed to the next step.
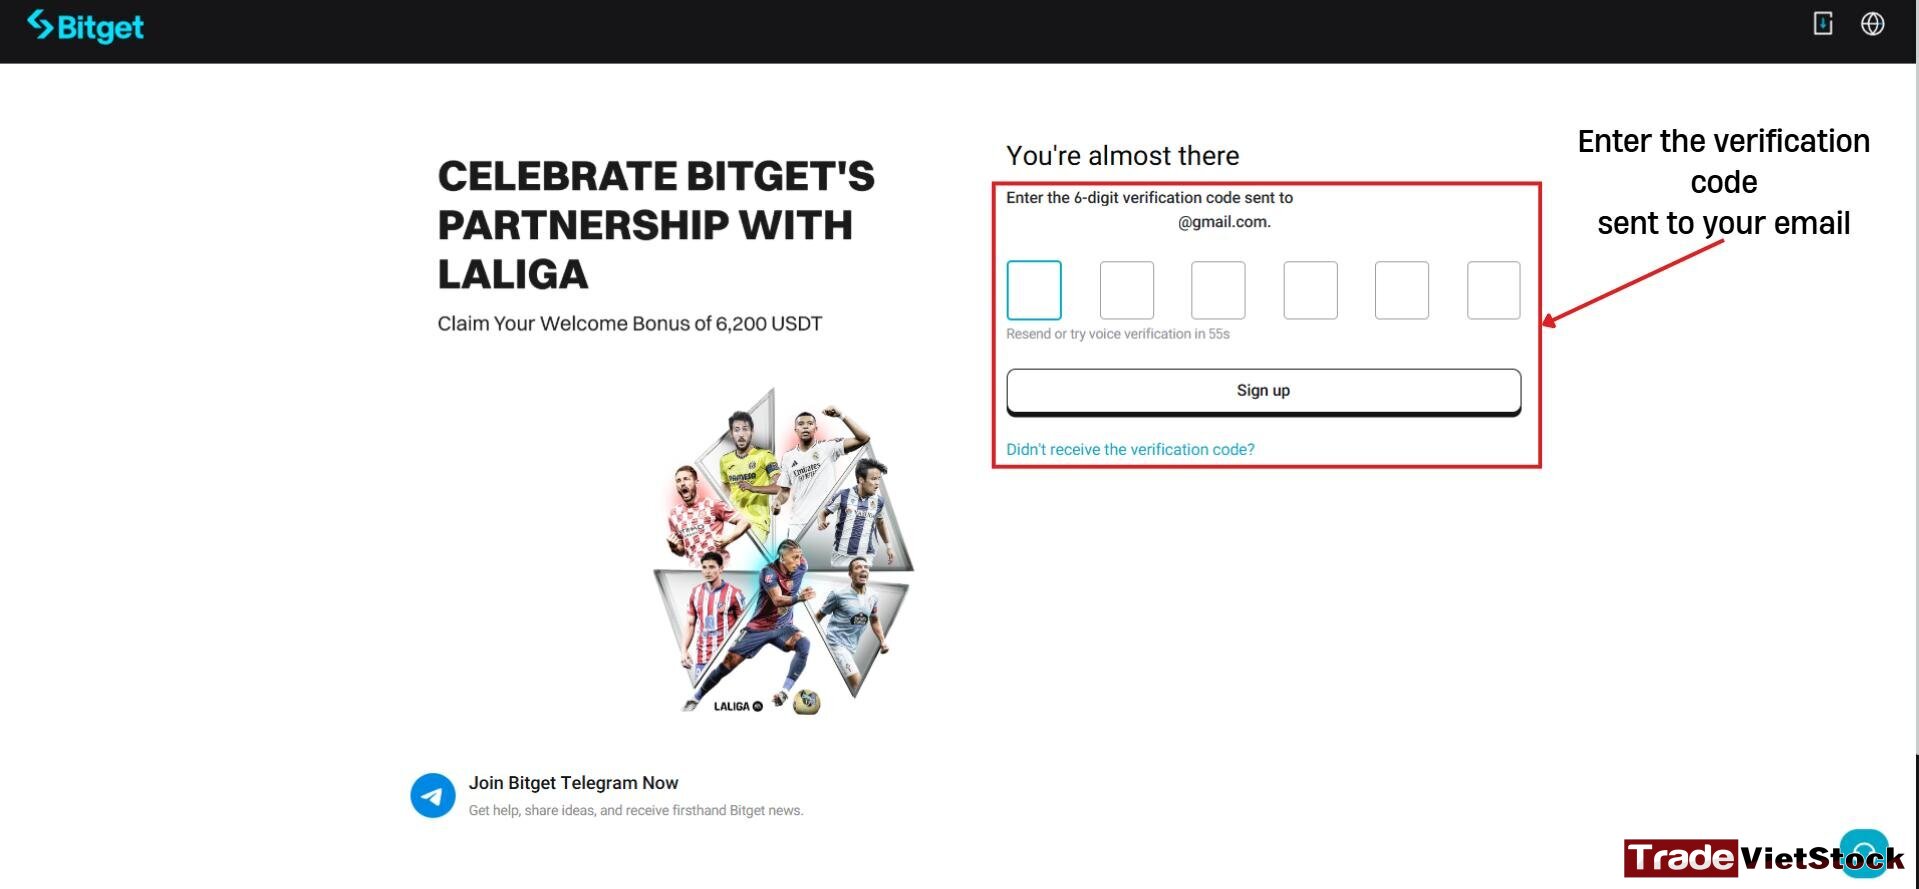
That’s it! You’ve completed the first stage of your Bitget trading account registration.
You can either continue the verification process right here on your browser, or download the Bitget app from the App Store or Google Play to complete it on your phone. Both methods are identical, so choose whichever is more convenient.
ii. Guide to Verify Your Bitget Account
After creating your account, the next step is to Verify your Bitget trading account to unlock all trading and withdrawal features. The verification process is quick and straightforward. Just follow the steps below.
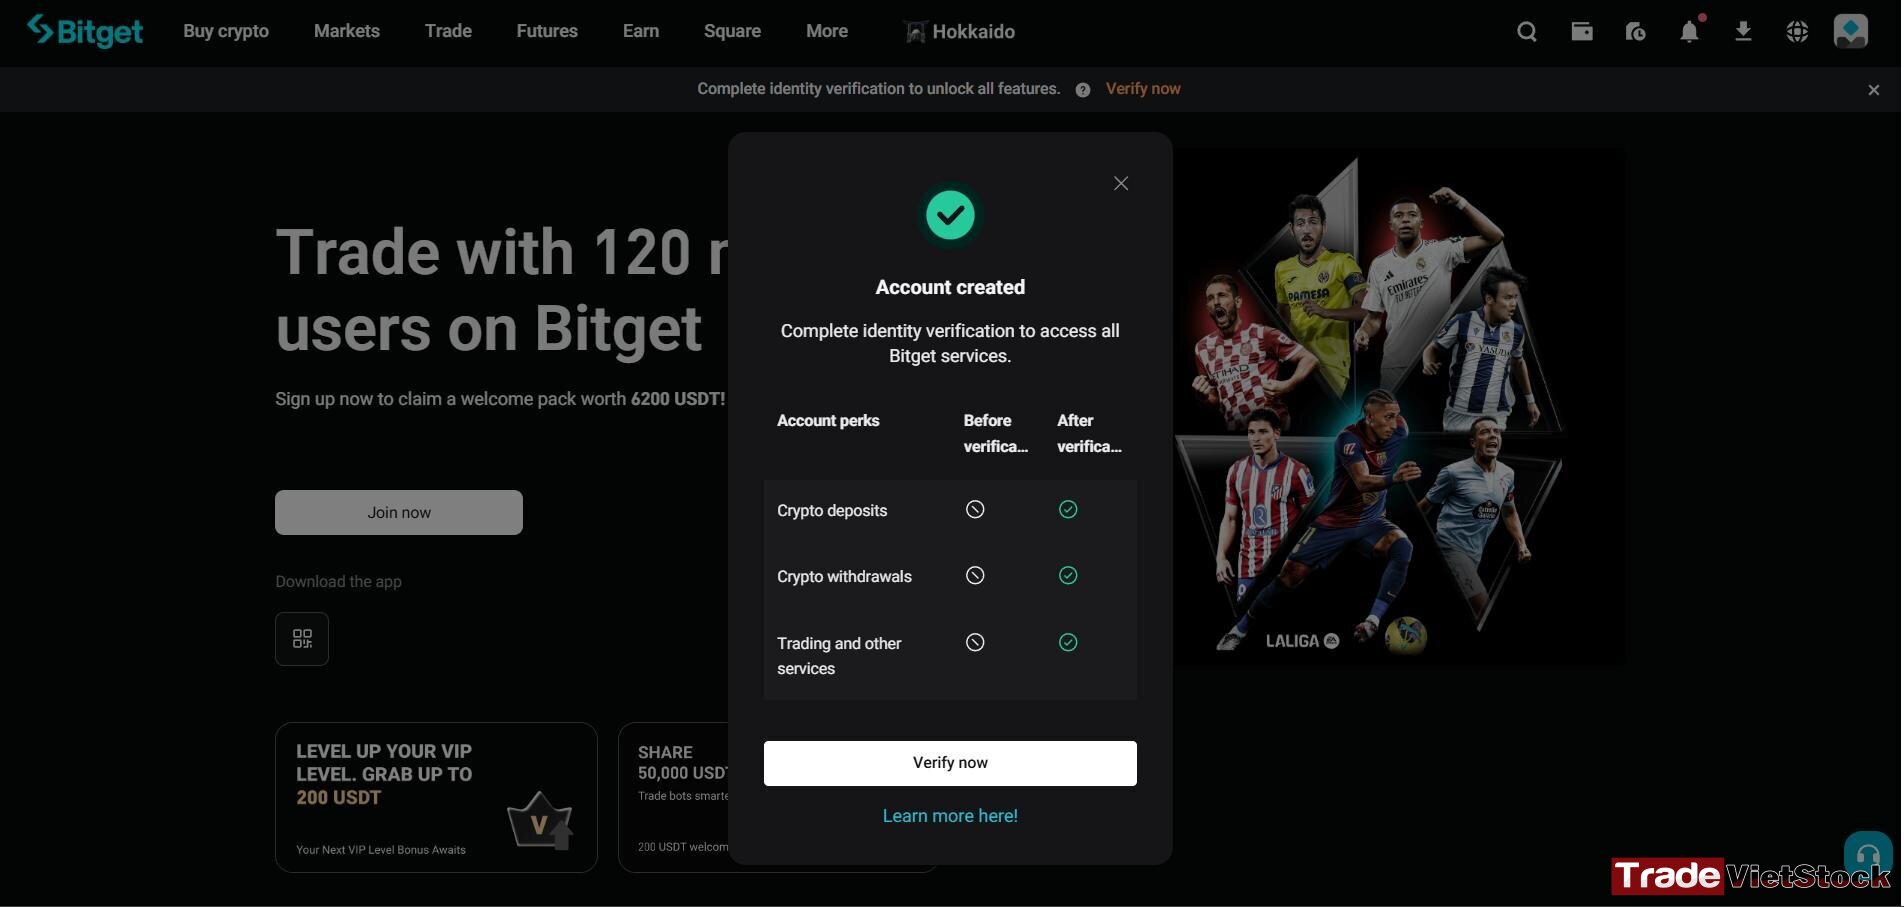
Step 1: Select your verification type
You’ll be given two options: Individual Verification or Business Verification.
If you’re registering as a retail trader, choose Individual Verification.
If you’re opening a corporate trading account, select Business Verification instead.
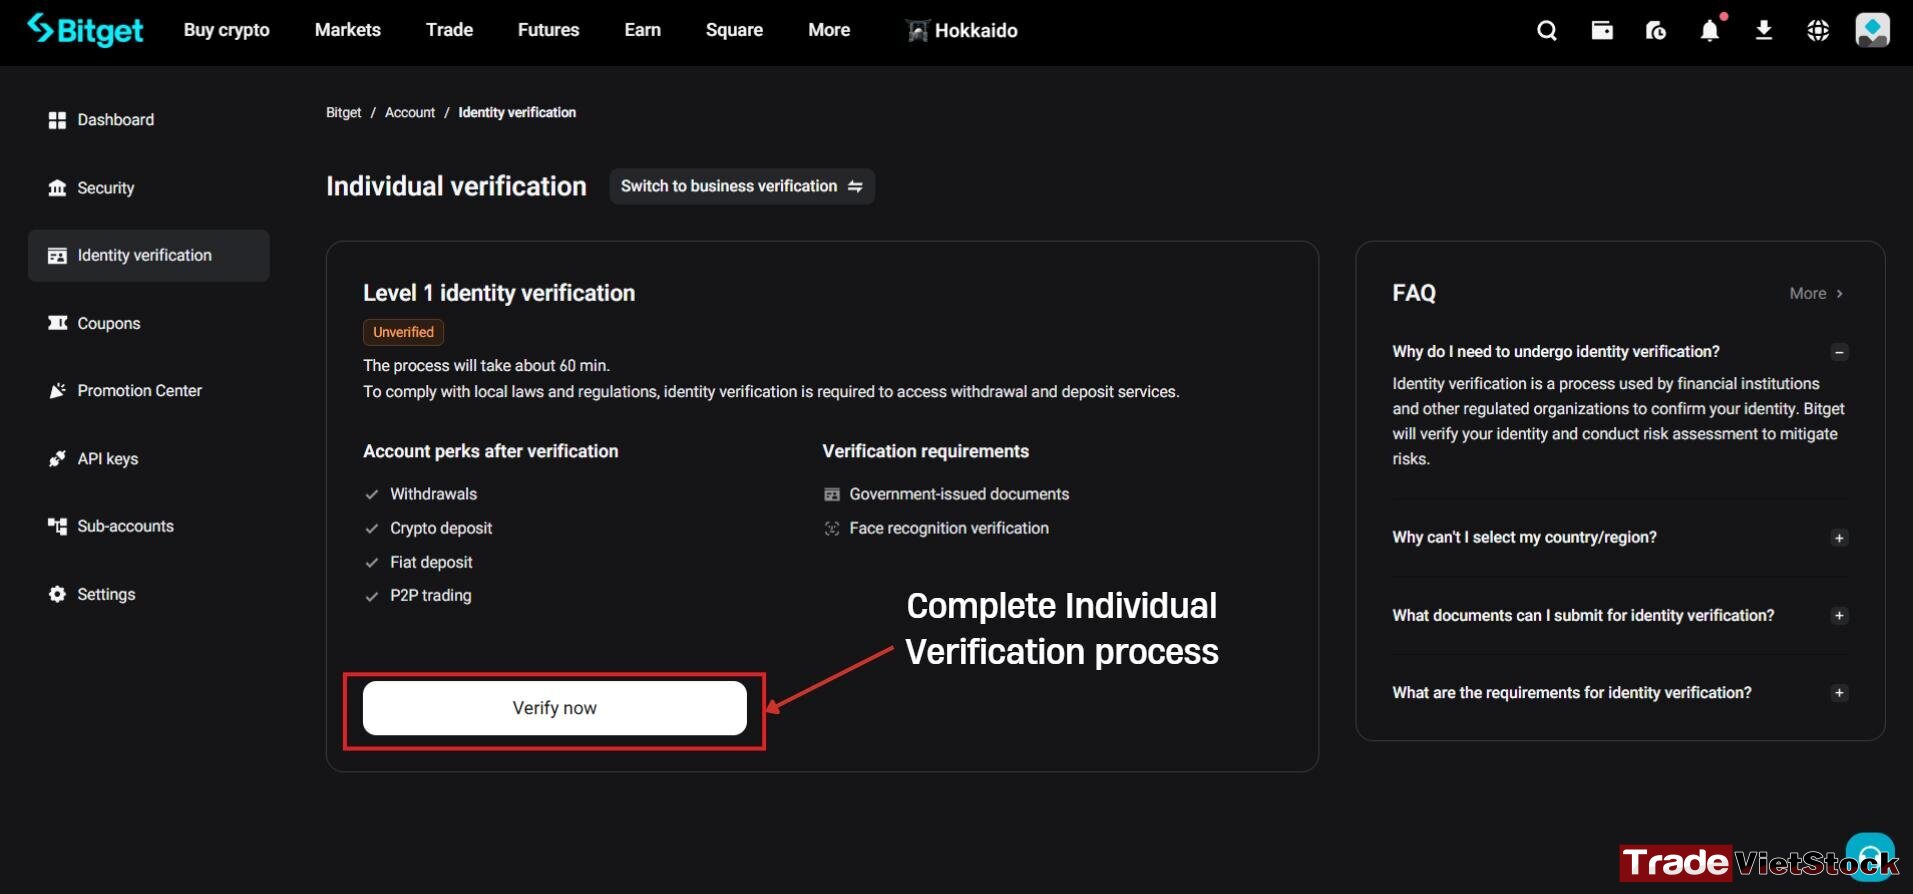
Step 2: Choose your country of residence
Before starting the ID verification process, select your country of residence and choose the type of identification document you want to use for verification.
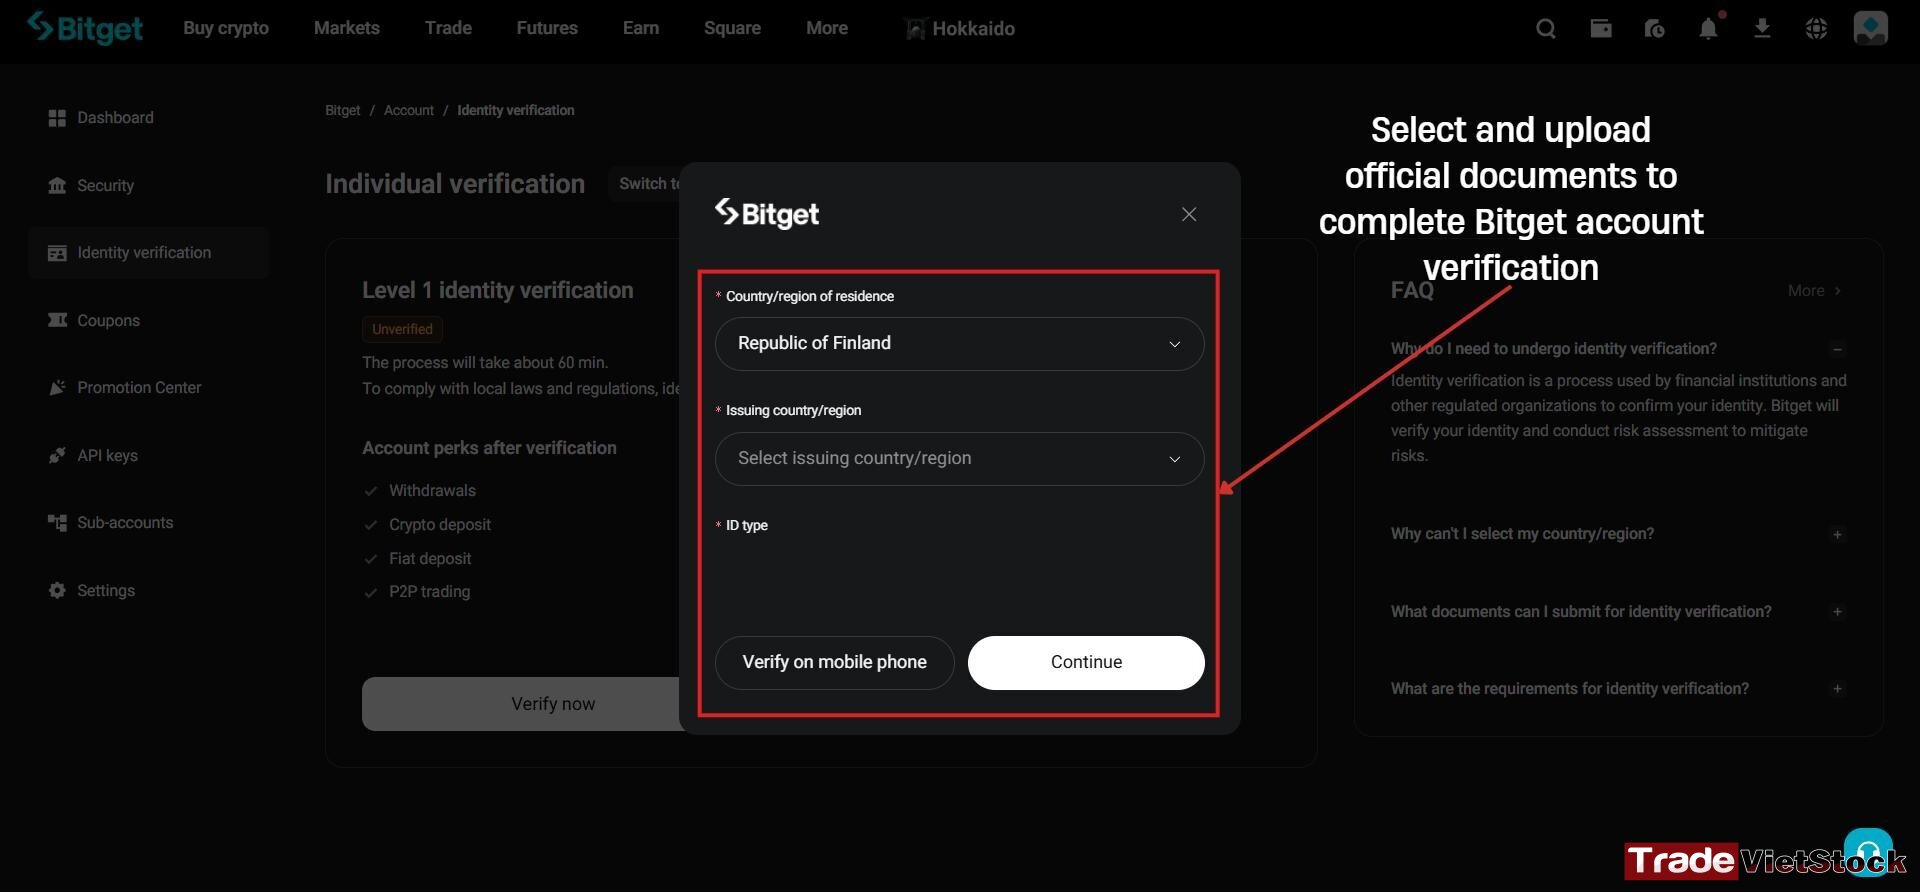
Step 3: Upload your documents
The Bitget verification process consists of three simple steps.
Upload a valid ID Card, Passport, or Driver’s License.
Complete the facial recognition scan / Liveness check to confirm your identity.
Wait for Bitget to review your submission — this usually takes just a few minutes.
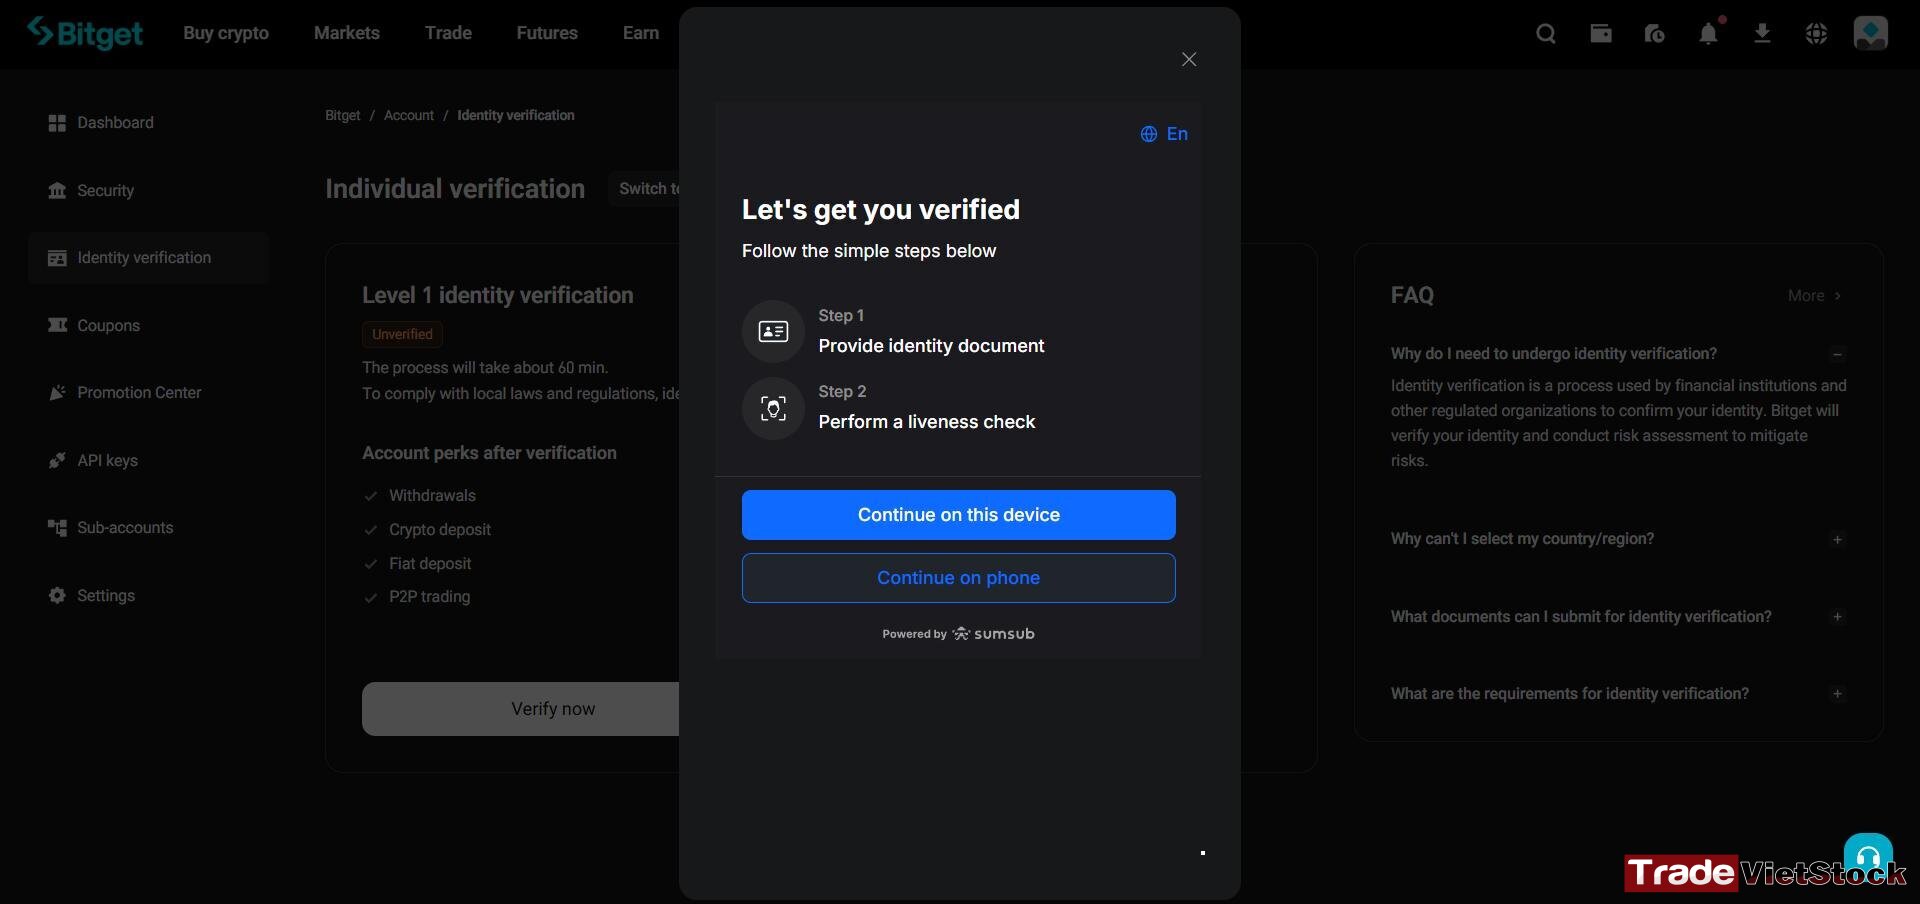
Facial verification is a crucial part of the process, ensuring your account’s security and compliance with global KYC standards.
Once your documents are approved, congratulations! You’ve completed both Bitget trading account registration and verification!
You’re now ready to start your trading journey.
Before placing your first trade, make sure to make your first deposit on Bitget via P2P Trading. Please check out our next tutorial below for a step-by-step guide
iii. How To Make Deposit On Bitget Account – P2P Trading Guide
In any cryptocurrency exchange, especially on a centralized platform (CEX), P2P Trading is one of the most convenient ways to deposit funds into your account.
After you sign up for a Bitget account, you’ll need to know how to make the first deposit on Bitget trading account quickly and securely.
Step 1: Start P2P Trading
On your Bitget homepage, select the “Buy Crypto” section located in the top navigation bar. From there, click on P2P Trading to begin your deposit process.
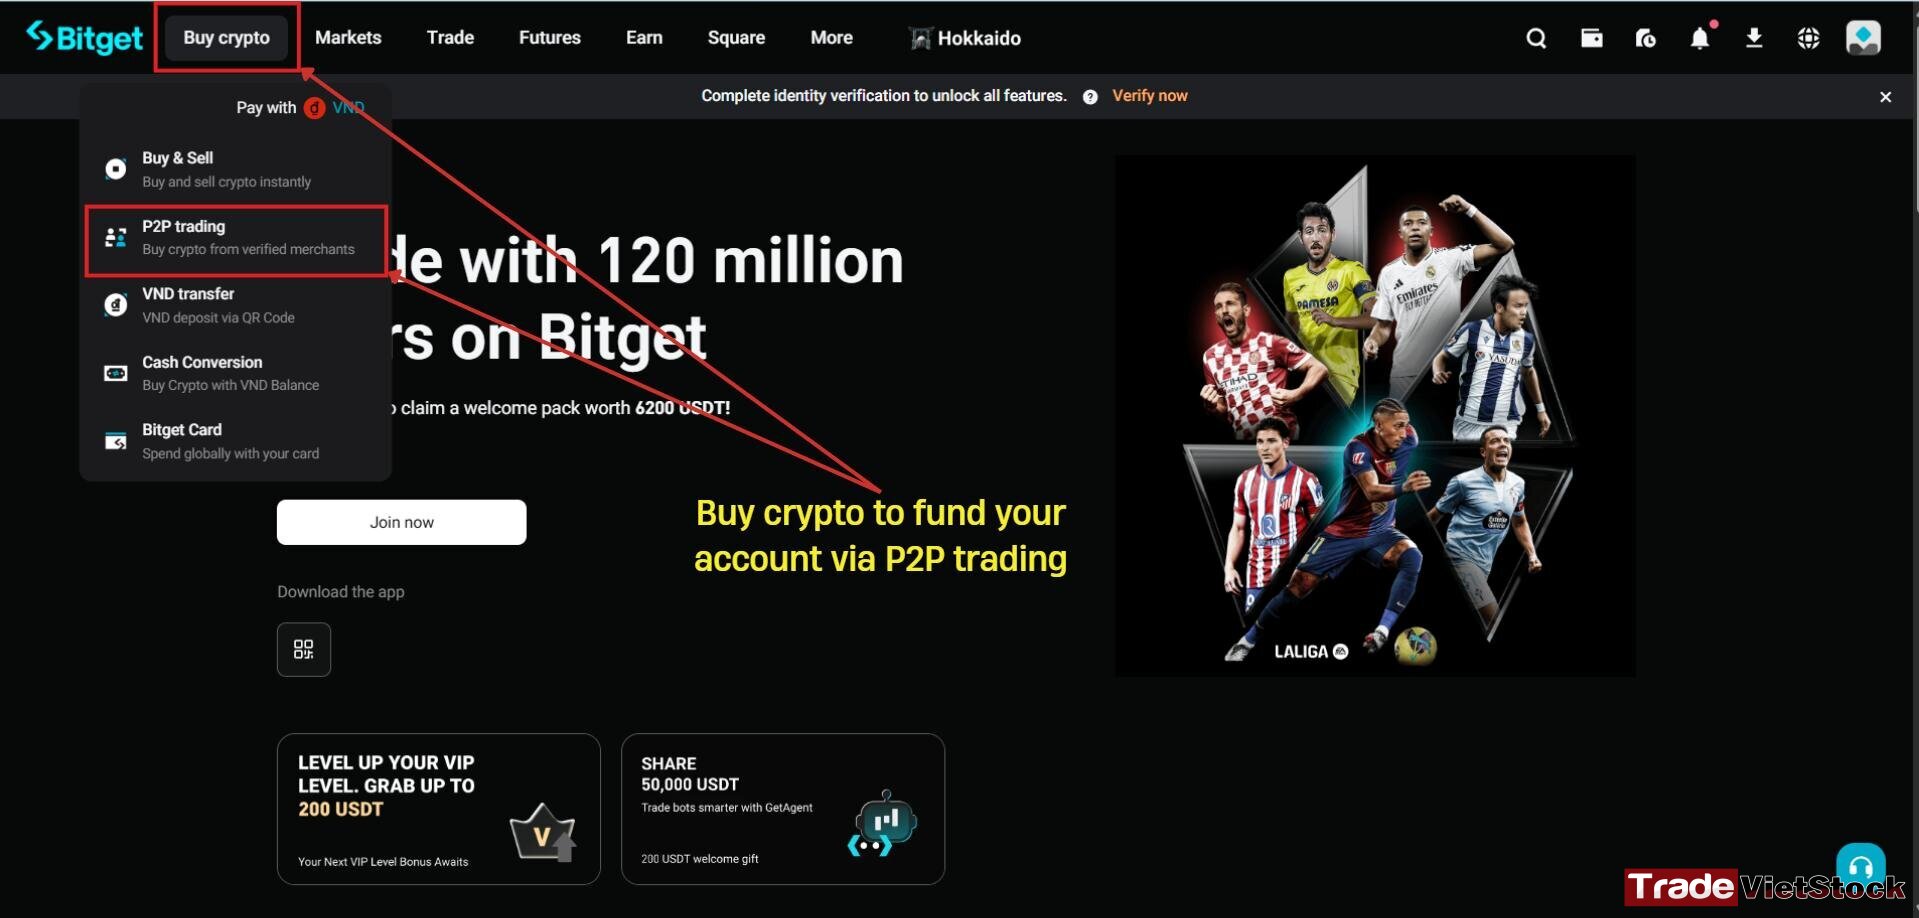
Step 2: Enter the required information
One of the most crucial parts of P2P trading on Bitget is choosing reliable merchants. Before selecting one, let’s go over how to filter your purchase criteria to buy USDT effectively.
Choose Buy, enter the amount of USDT you wish to purchase, and select your payment method.
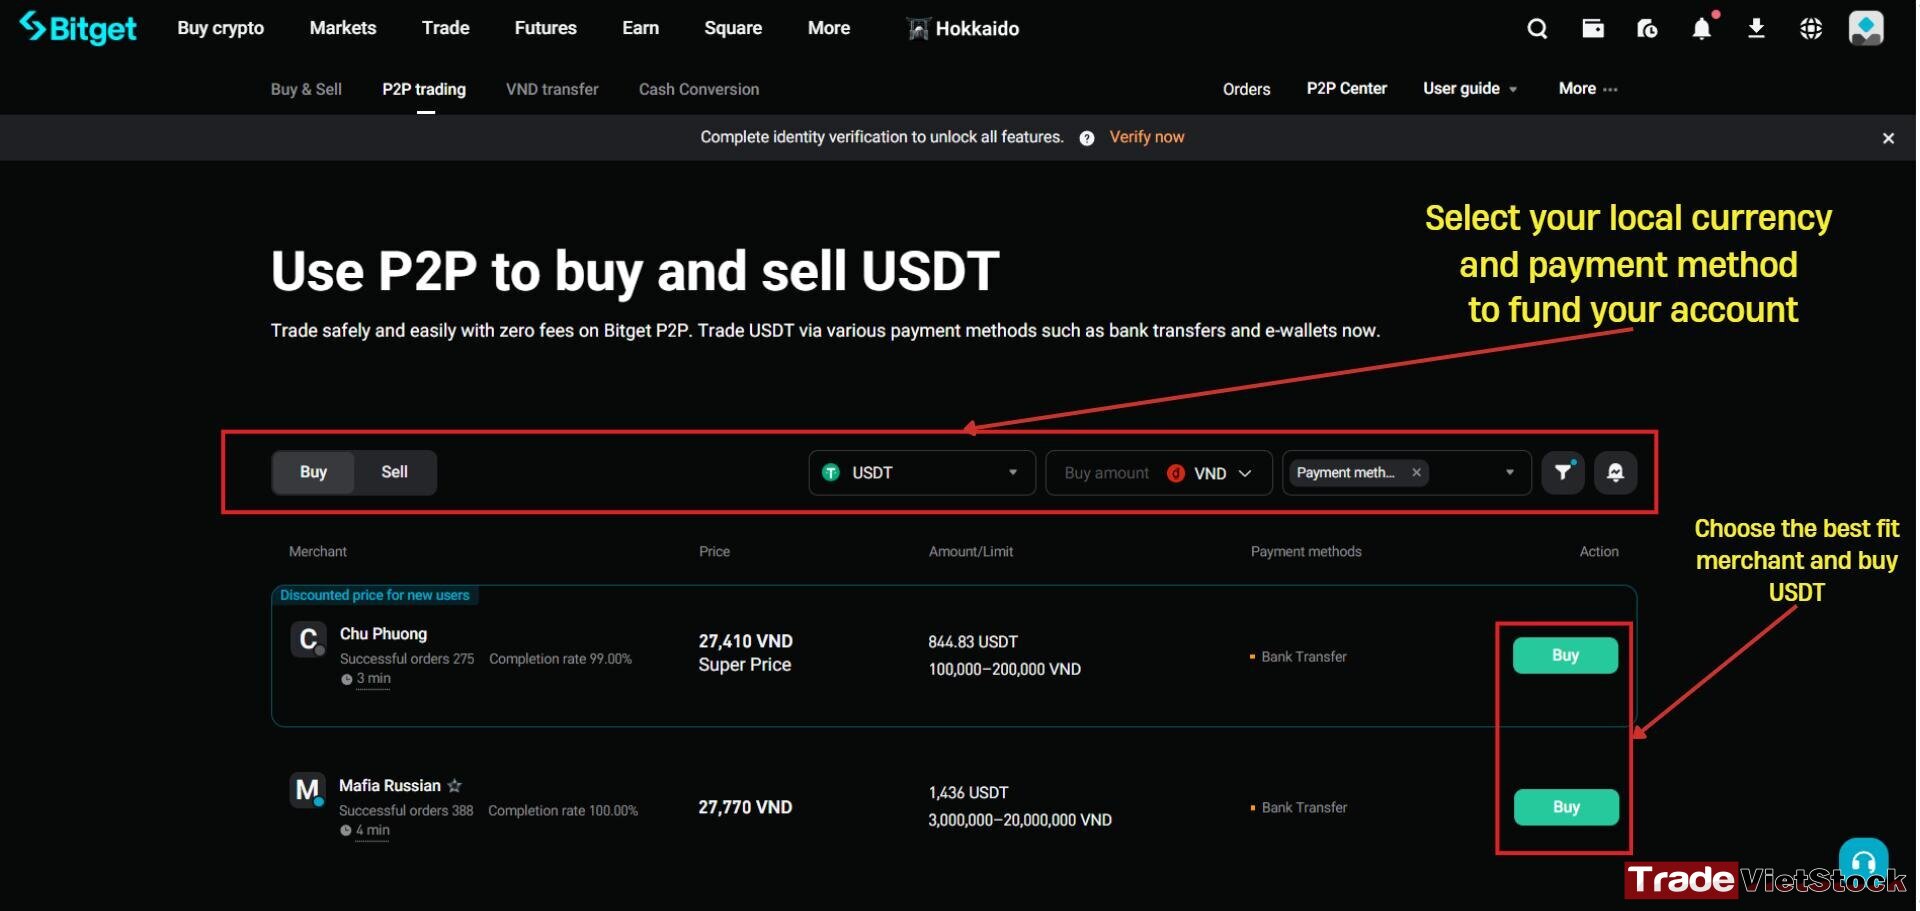
Evaluate your merchant before you click Buy.
Not every merchant is trustworthy. Some may delay confirmations for hours, which can be frustrating. Here’s how to evaluate them properly:
- Check their 30-day trade count and completion rate. The higher these are, the more reliable the merchant.
- Review their available USDT balance. If you plan to buy a large amount, make sure the merchant can fulfill your order.
After verifying these details, select Buy USDT from your chosen merchant.
Step 3: Complete the transfer and receive your USDT
Once you’ve chosen a merchant, enter the payment amount and review the USDT quantity you’ll receive. Then click Buy USDT.
Be sure to read the advertiser’s terms carefully before proceeding — they usually include payment time limits, transfer notes, or banking details.
Failure to follow these instructions could delay your transaction and require manual intervention from the merchant or customer support.
After you’ve completed your bank transfer, simply wait a few minutes for the merchant to confirm and release your USDT directly into your Bitget wallet.
You’re all set!
Congratulations — you’ve now completed the Bitget registration, verification, and deposit on Bitget all at once! You’re officially ready to start trading and investing.
At Tradevietstock, we hope this guide helps you begin your crypto journey confidently — and who knows, maybe multiply your assets and reach financial freedom one day.
To support our effort in creating high-quality, informative content, you can register your Bitget trading account via the link below.
If you’re interested in exploring other exchanges, check out the Crypto section on the left-hand side for more sign-up tutorials and platform comparisons.