Tiếng Việt
Mexc sign up in Nigeria
| Date: 12/01/2026 | 1477 Views | Cryptocurrency Exchange Registration |

Mexc sign up in Nigeria – The ultimate guide to complete deposit and start trading
What actually makes MEXC worth it?
- The Fees (obviously): It’s hard to beat 0% maker fees. If you’re a limit-order trader, this is a game changer.
- No-Hassle P2P: Buying USDT directly is fast and doesn’t involve jumping through ten different hoops.
- Free Airdrops: If you hold their native MX token, they basically just drop new project tokens into your account. It’s a nice bit of passive income.
- Early Listings: They tend to list new tokens way before Binance or Coinbase, which is great if you like catching trends early.
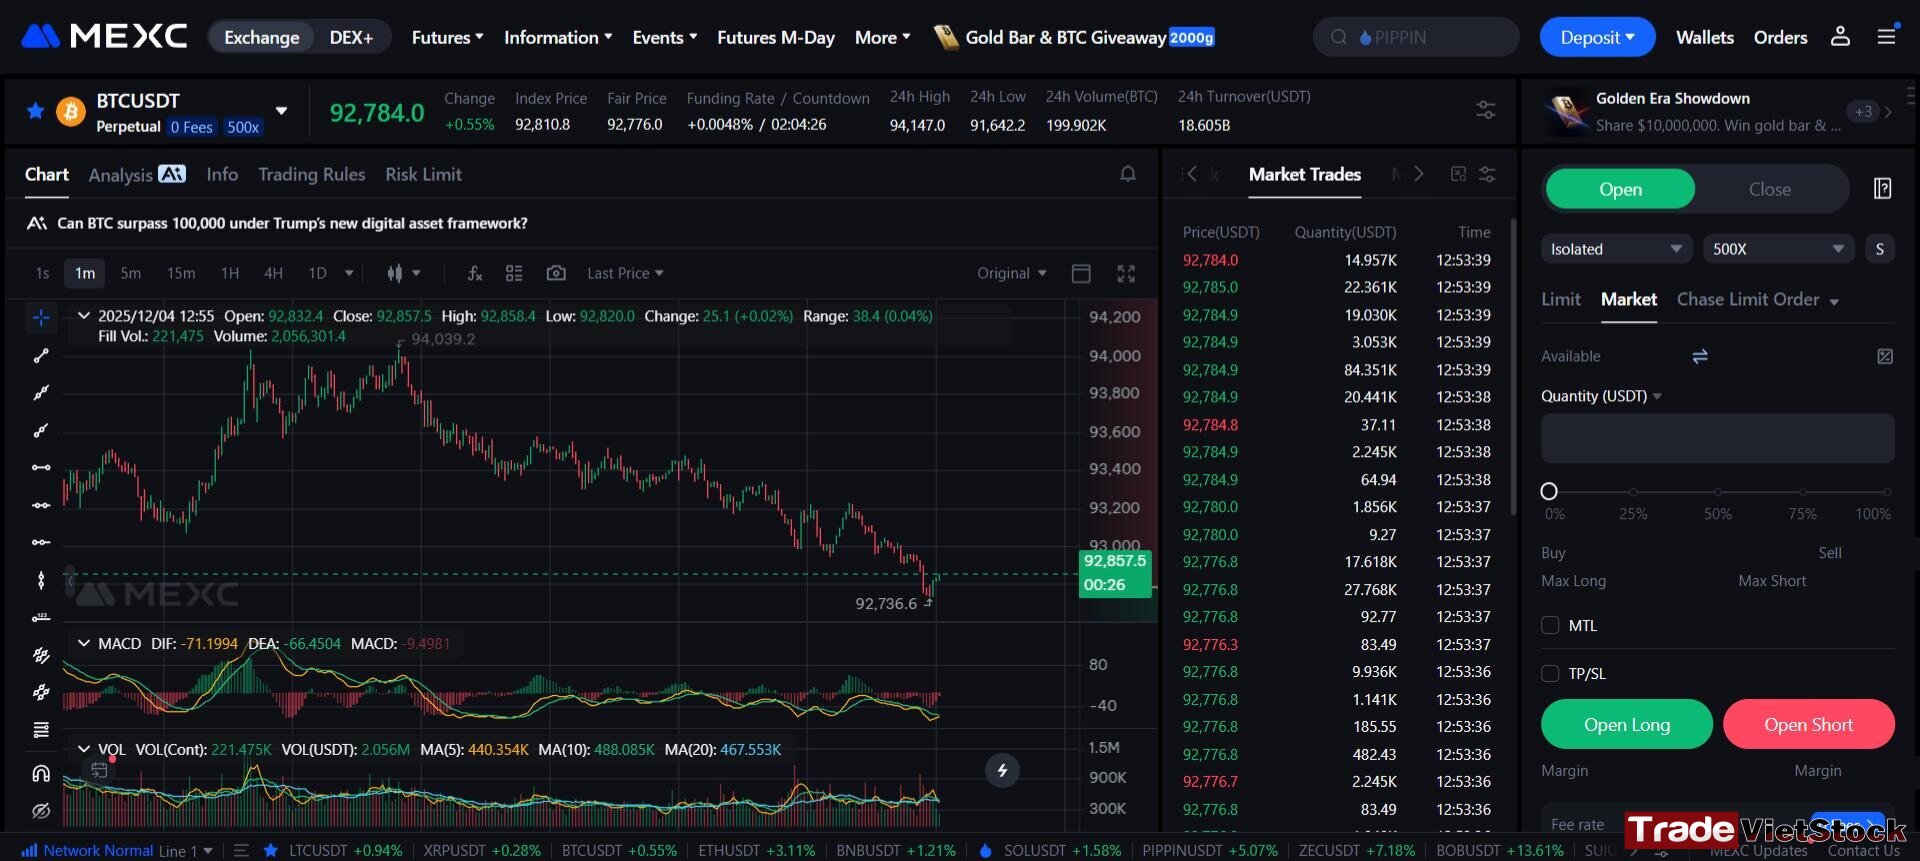
i. Getting Your Account Ready in 3 Minutes
Setting this up is straightforward, but here is exactly how to do it to make sure you grab the sign-up bonus.
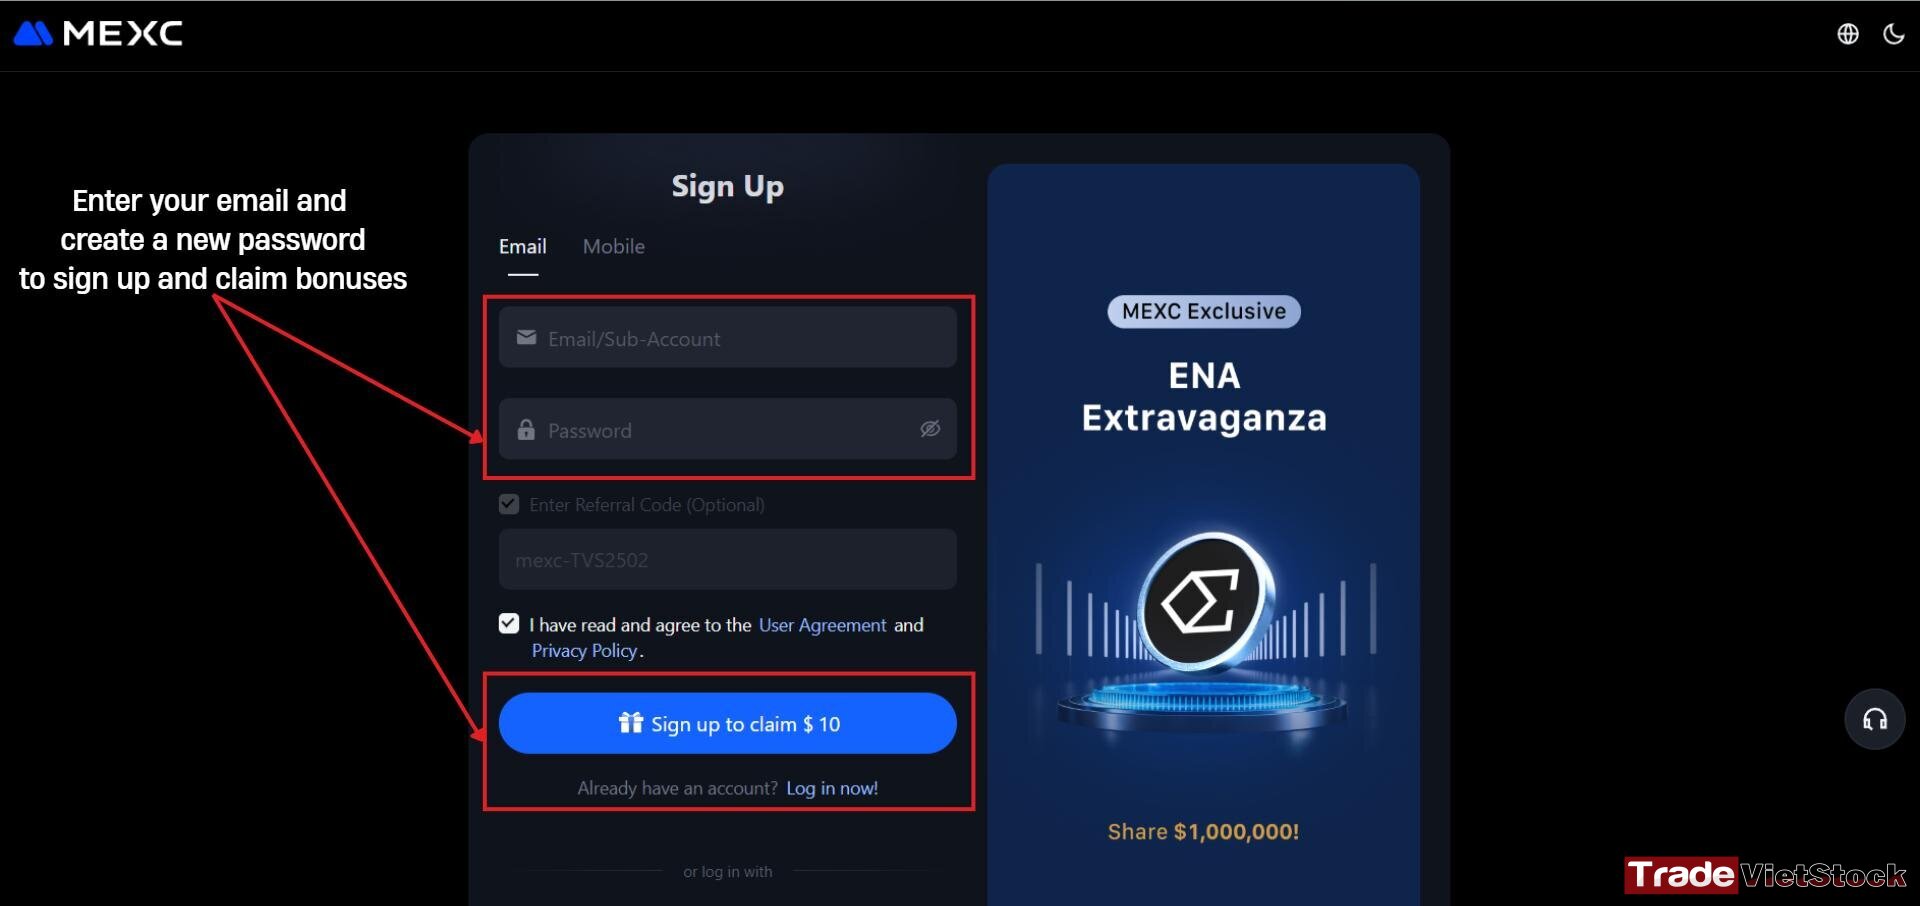
Step 1: Click the sign up link right here => [MEXC Sign Up Page].
You’ll see a prompt to claim a welcome bonus (usually around $10–$20 depending on the current promo).
Step 2: Account Details
You can use either your email or a phone number. Pick a strong password—seriously, this is crypto, don’t use the same one you use for Netflix. Click “Sign Up” once you’re ready.
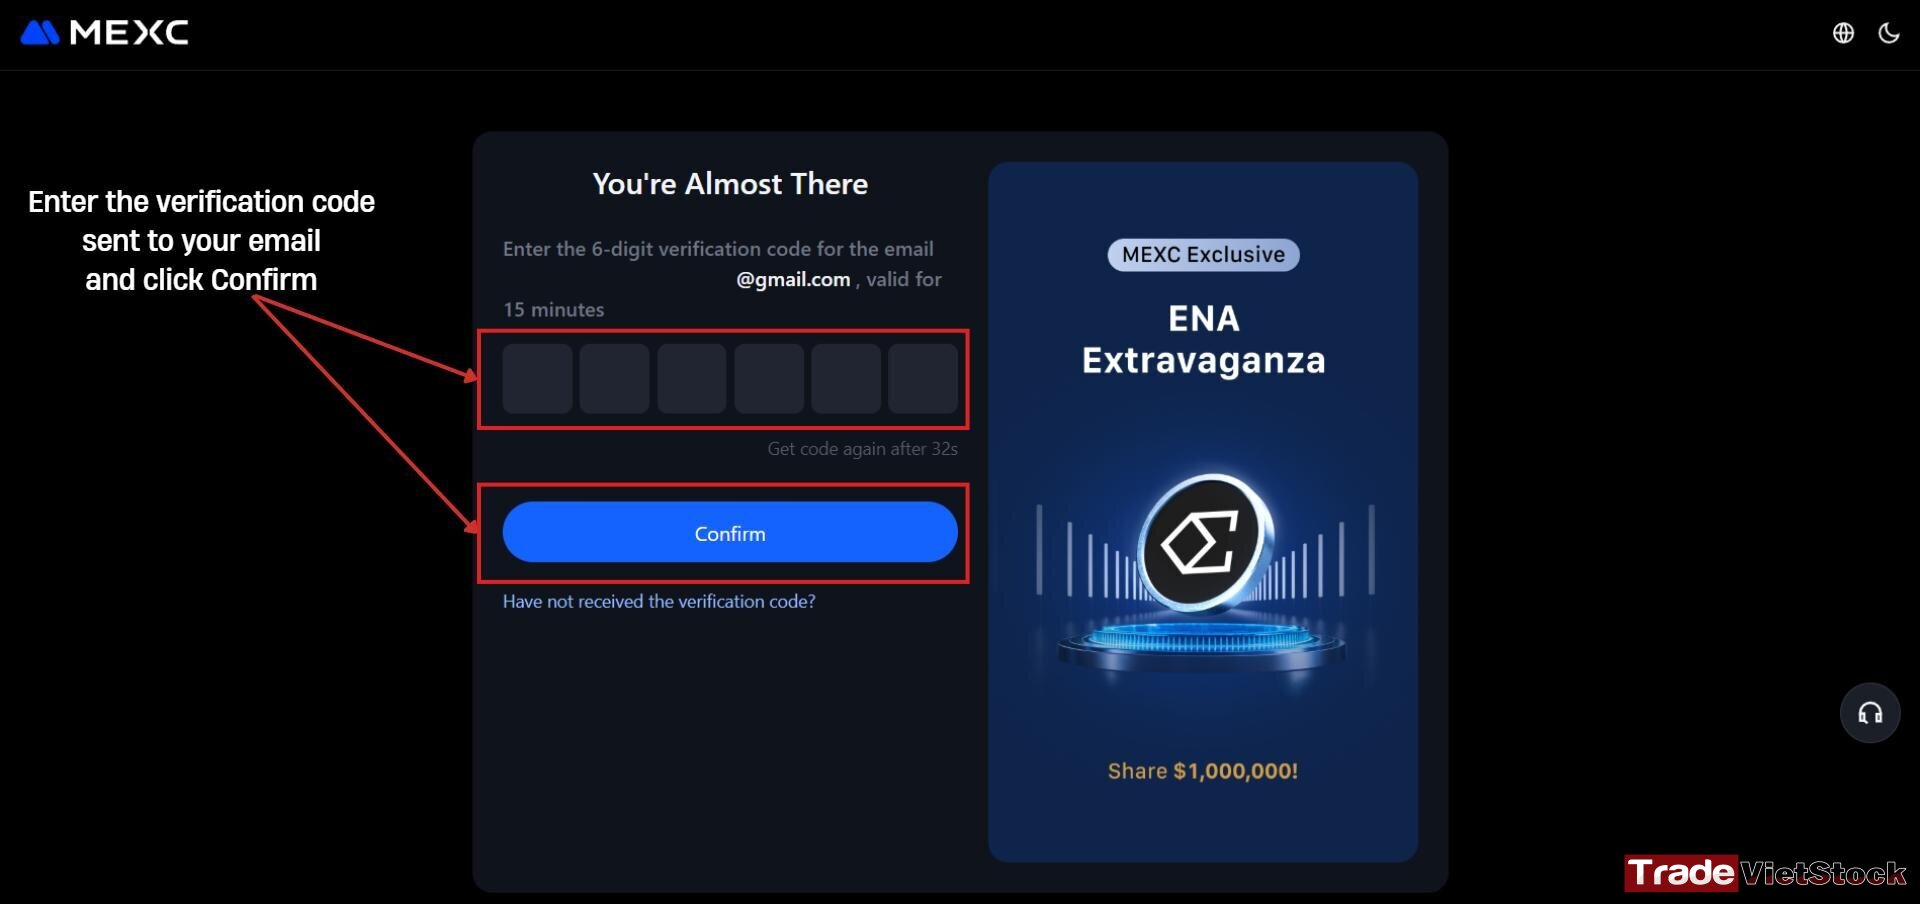
Step 3: Verification
Check your inbox for a 6-digit code. Pop that into the box on MEXC and hit “Confirm.”
That’s it. You’re officially in. You’ll be dropped into your dashboard where you can see the markets.
Quick Tip: Before you deposit a bunch of money, I highly recommend finishing the KYC (Identity Verification). It usually only takes a few minutes, but it secures your account and lifts withdrawal limits so you don’t run into issues later.
ii. Getting Verified: The MEXC KYC Guide
While you can technically start trading right after signing up, I always tell people to get their KYC (Know Your Customer) done immediately. It’s not just about following rules; it’s the best way to make sure your account is actually yours if you ever lose your phone or need to recover your login.
1. Which KYC level do you need?
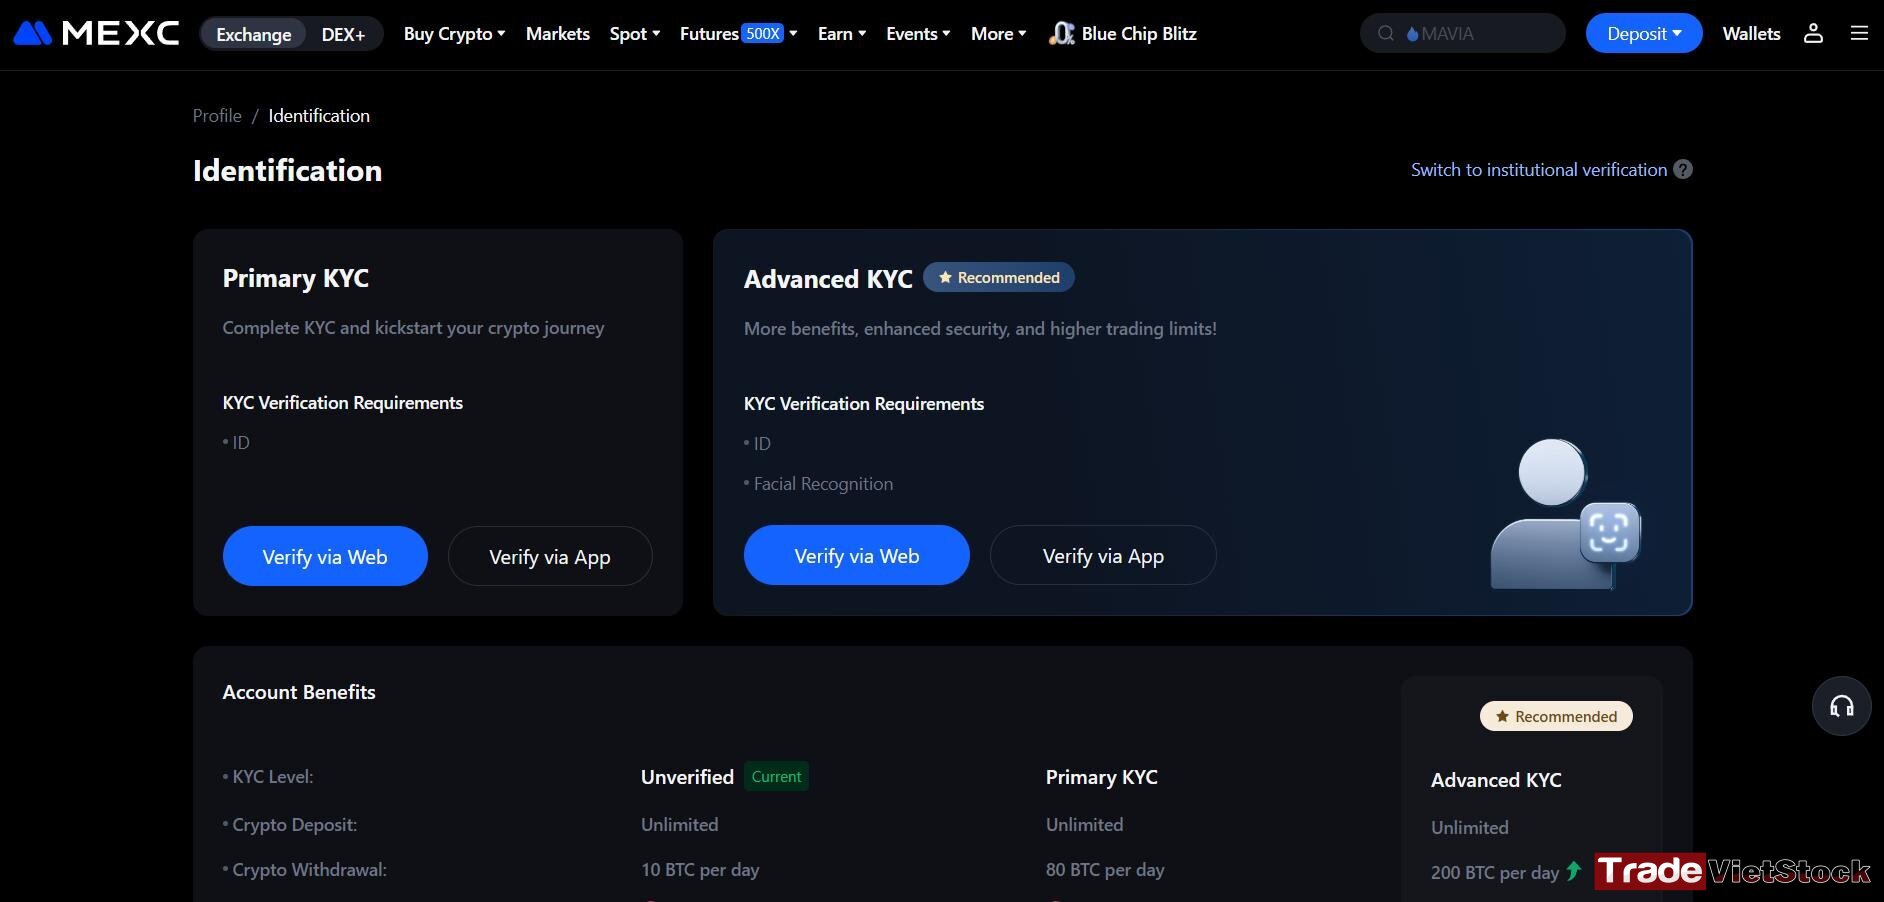
MEXC keeps it simple with two tiers. For 99% of people, the first level is plenty.
Primary KYC: This is the “standard” one. You just need your ID (Passport, Driver’s License, or National ID). Once you’re cleared, your withdrawal limit jumps to 80 BTC per day. Unless you’re a whale, this is more than enough.
Advanced KYC: This adds a quick facial recognition scan (using your phone or webcam) to prove it’s really you. This bumps your limit to 200 BTC per day. I’d recommend this if you plan on moving large amounts of capital frequently.
2. How to get through it quickly
The process is pretty automated now. Just head to your profile settings and click “Identification.”
A heads-up on photos: Since 2023, MEXC has tightened up their security. You cannot upload old photos saved on your computer anymore. You’ll need to take “live” photos of your ID and yourself using your phone or laptop camera during the process. This prevents people from using fake or stolen documents.
My advice: Use the MEXC mobile app for this part. It’s much easier to snap a clear photo of your ID with your phone camera than it is to hold it up to a laptop webcam.
iii. Step-by-Step: Getting Your Account Verified
Whether you’re on your laptop or using the app, to complete Mexc sign up in Nigeria, the process is pretty much the same. I usually recommend going straight for the Advanced KYC—it only takes an extra minute and saves you from having to come back and do it later when you want to withdraw more funds.
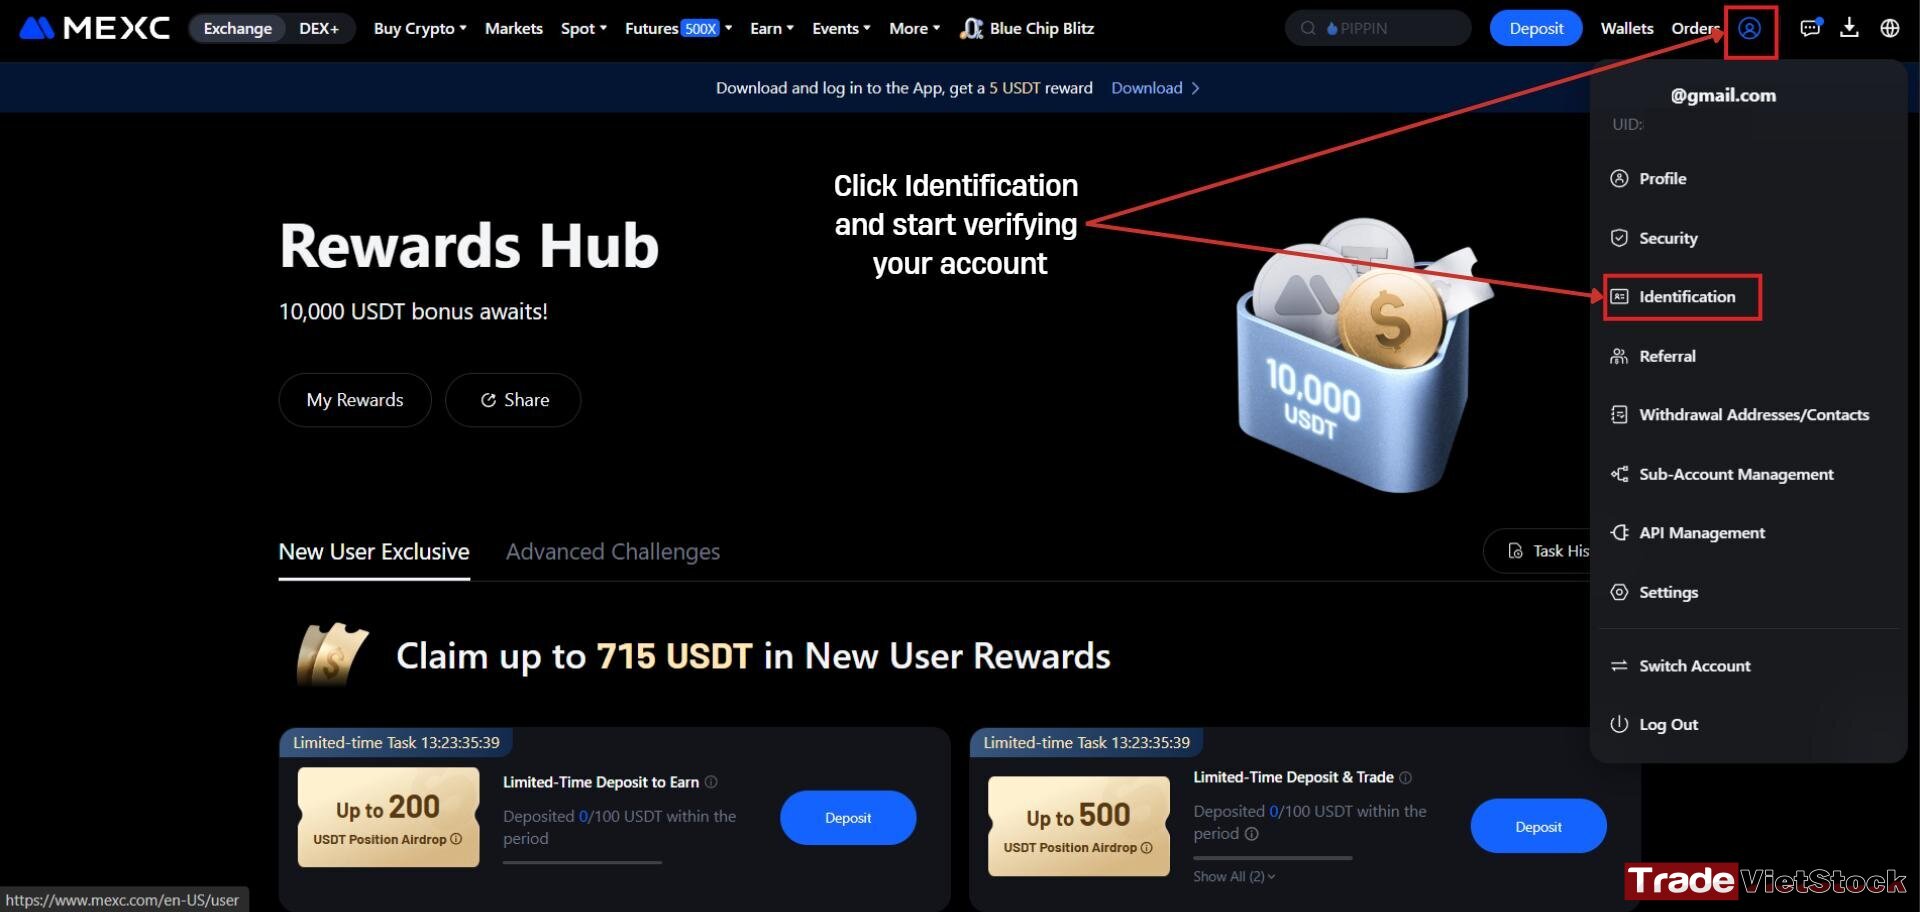
Step 1: Head to the “Identification” Tab
Once you’re logged in, look for the profile icon (the little person) in the top right corner. From the dropdown menu, just click on “Identification.”
Step 2: Choose Your Level
You’ll see the choice between Primary and Advanced. Again, I’d suggest Advanced KYC. It’s the best way to “future-proof” your account and ensures you won’t hit any random limits during a bull run.
Pro Tip: If you’re on a desktop, this is a great time to switch to the MEXC app. Using your phone’s camera for the facial scan is so much smoother than trying to angle your face into a laptop webcam.
Step 3: The Paperwork (and Photos)
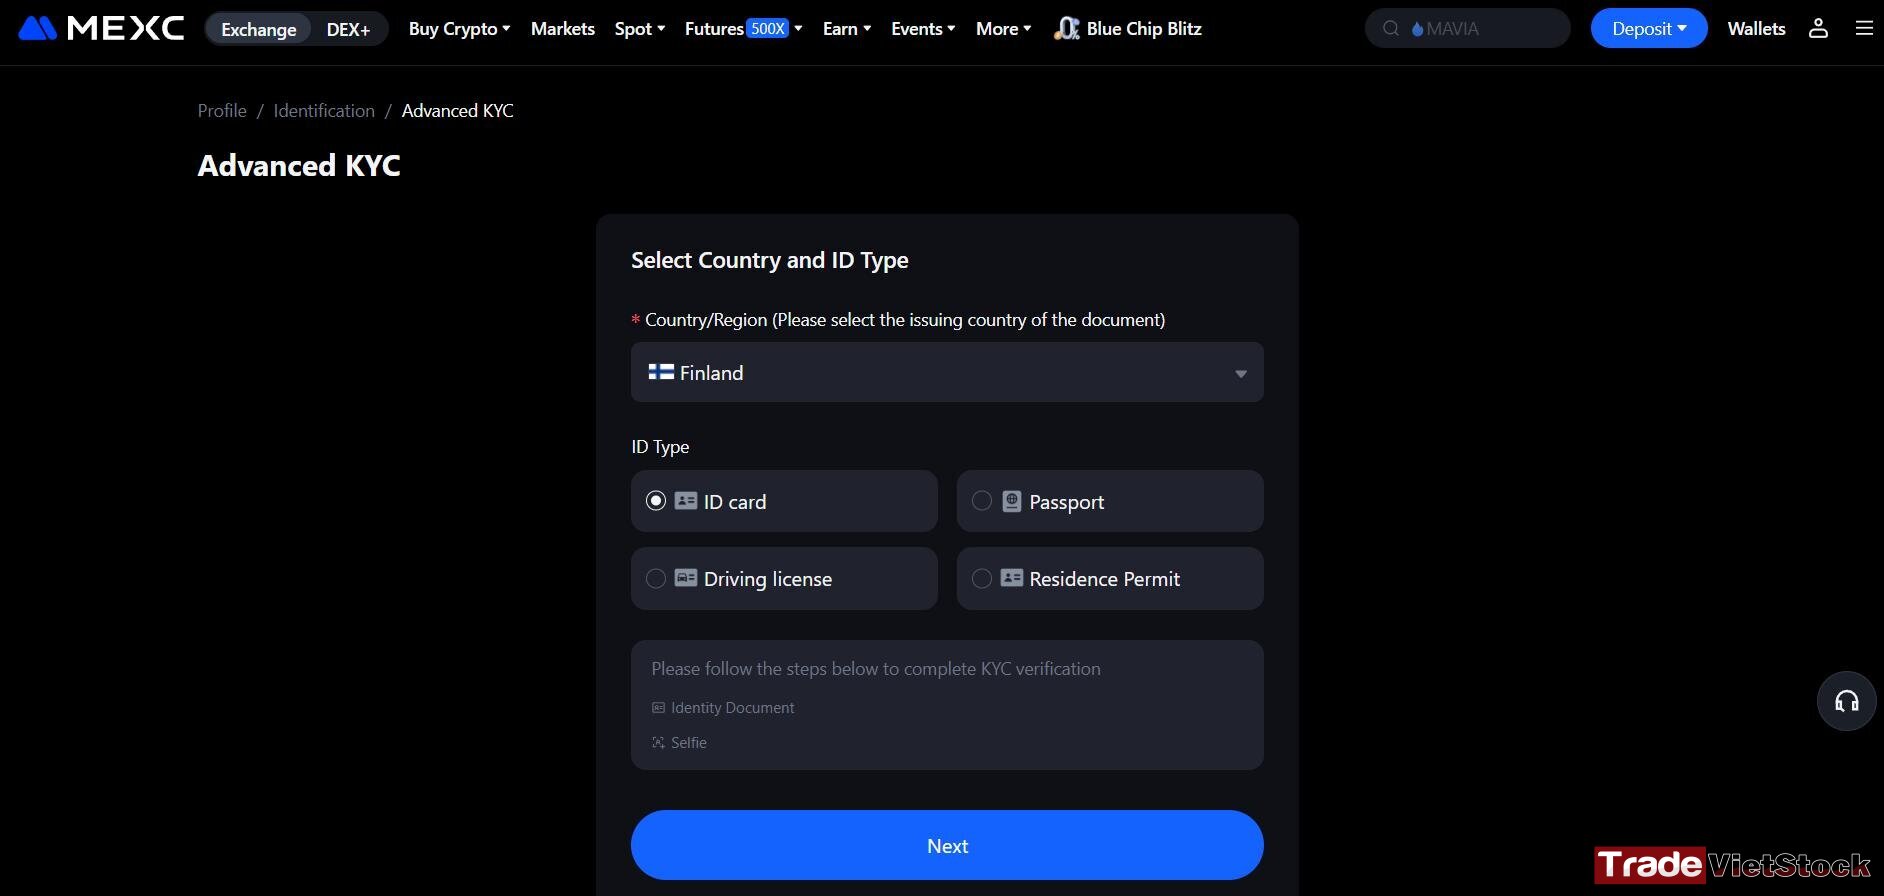
You’ll need to enter your basic info: country, full name, and ID number. Then, you’ll be asked for photos of your document.
- Make sure the lighting is good. If there’s a glare on your ID, the system will likely reject it.
- Keep it steady. Blurry photos are the #1 reason for verification delays.
- Front and Back. Don’t forget to snap both sides of your ID or license.
Once you’ve uploaded everything, just hit “Submit for Review.“
Step 4: The Waiting Game
In my experience, MEXC is surprisingly fast. If your photos are clear, you’ll usually get a notification that you’re verified within a few minutes. If the system is busy, it might take a bit longer, but it’s rarely a long wait.
iv. Making Your First Deposit (and Snagging That Bonus)
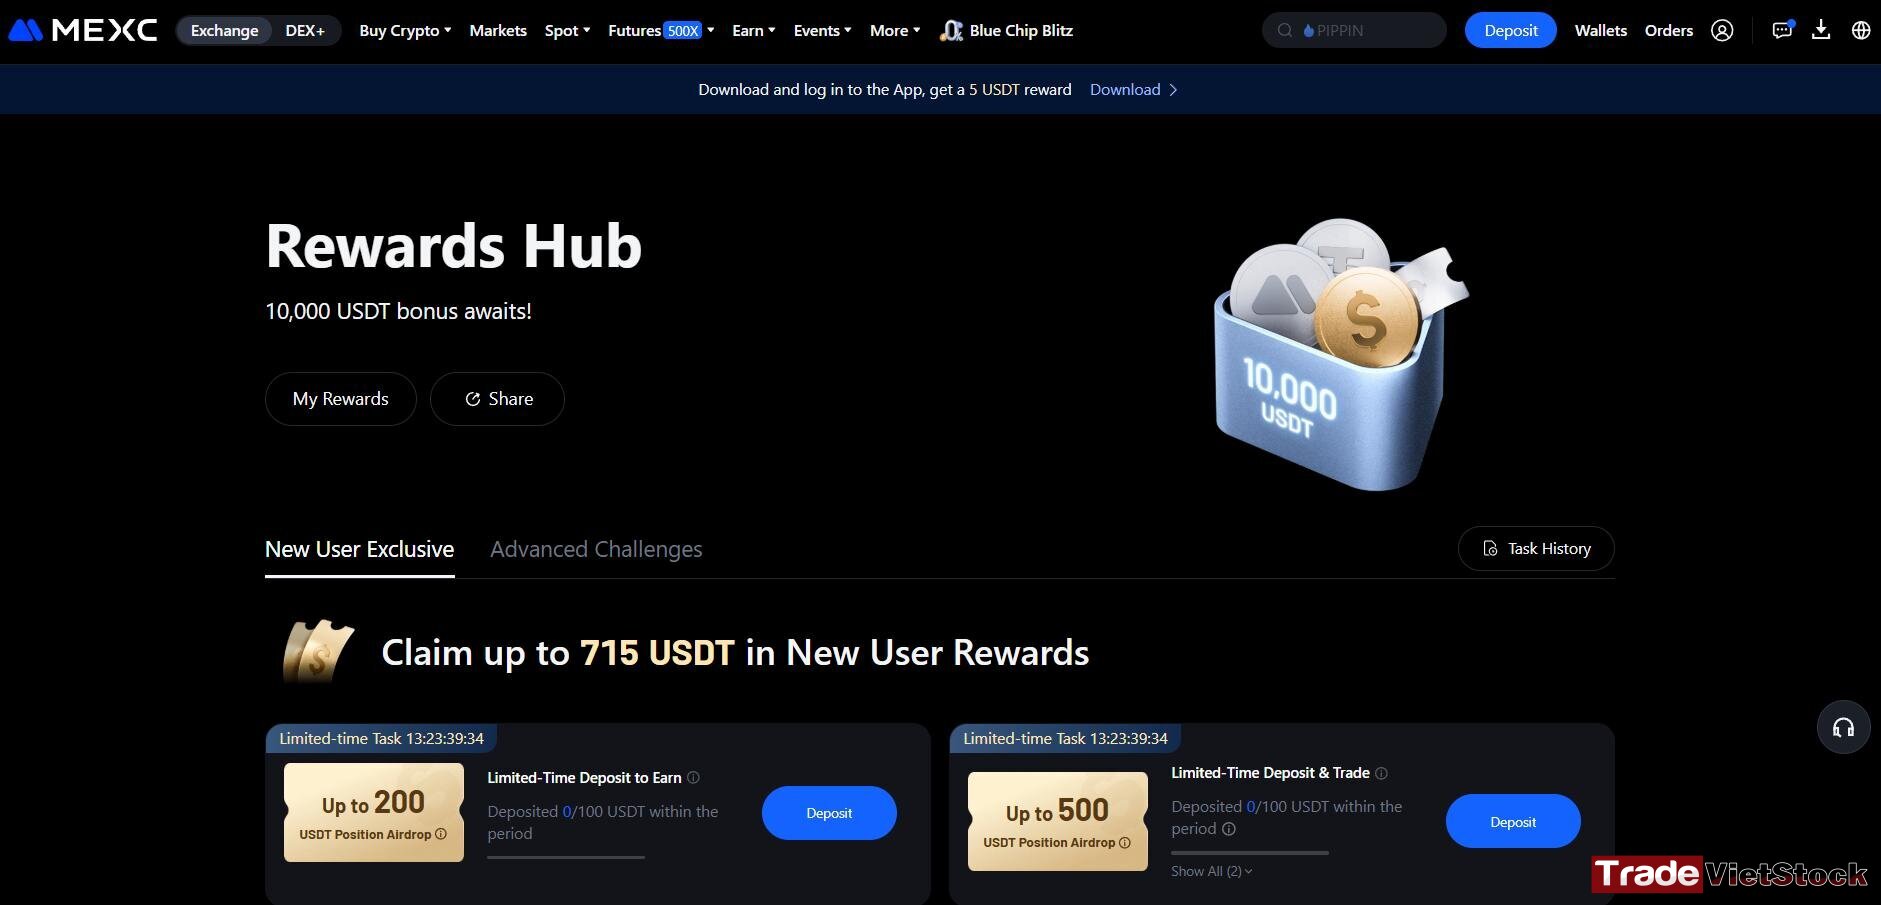
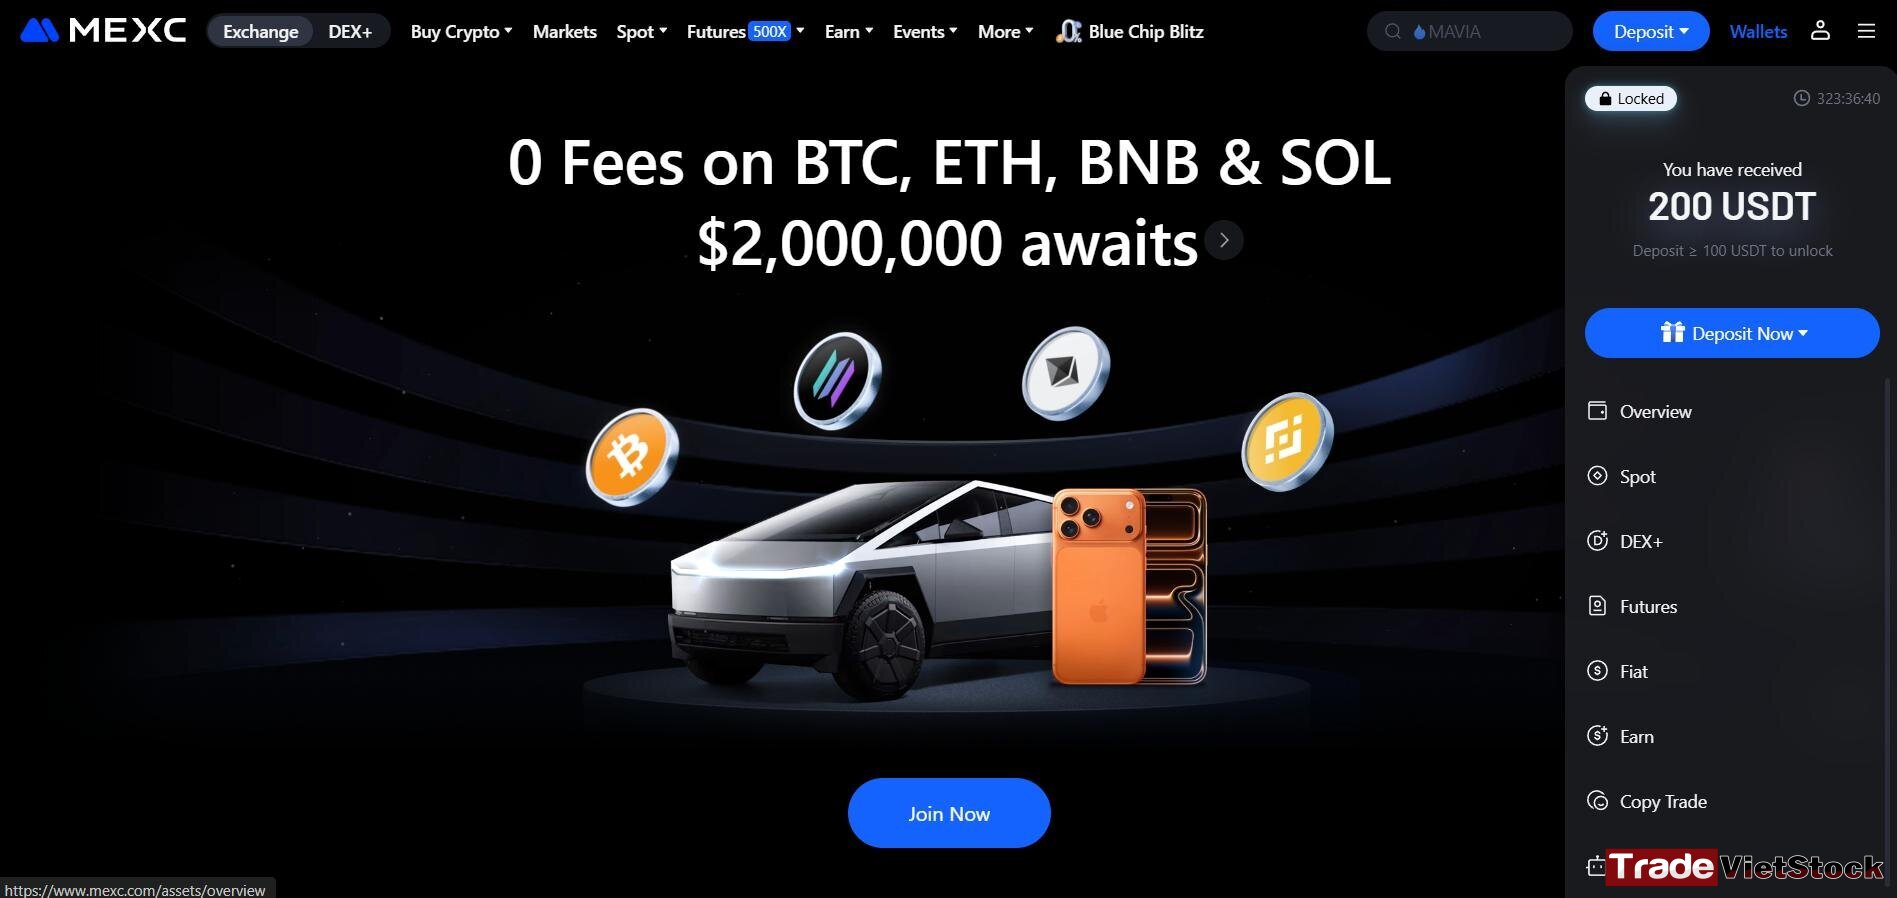
After you complete Mexc sign up in Nigeria, you can start making deposit into your Mexc account. Now for the best part: getting some capital into your account. If you’re a new user, keep an eye on the Rewards Hub. MEXC is pretty generous with welcome offers—often giving a 200 USDT position airdrop or similar bonuses if you deposit at least 100 USDT within your first week.
If you don’t already own crypto on another wallet, P2P (Peer-to-Peer) is your best bet. It lets you buy USDT directly from other traders using your local bank account.
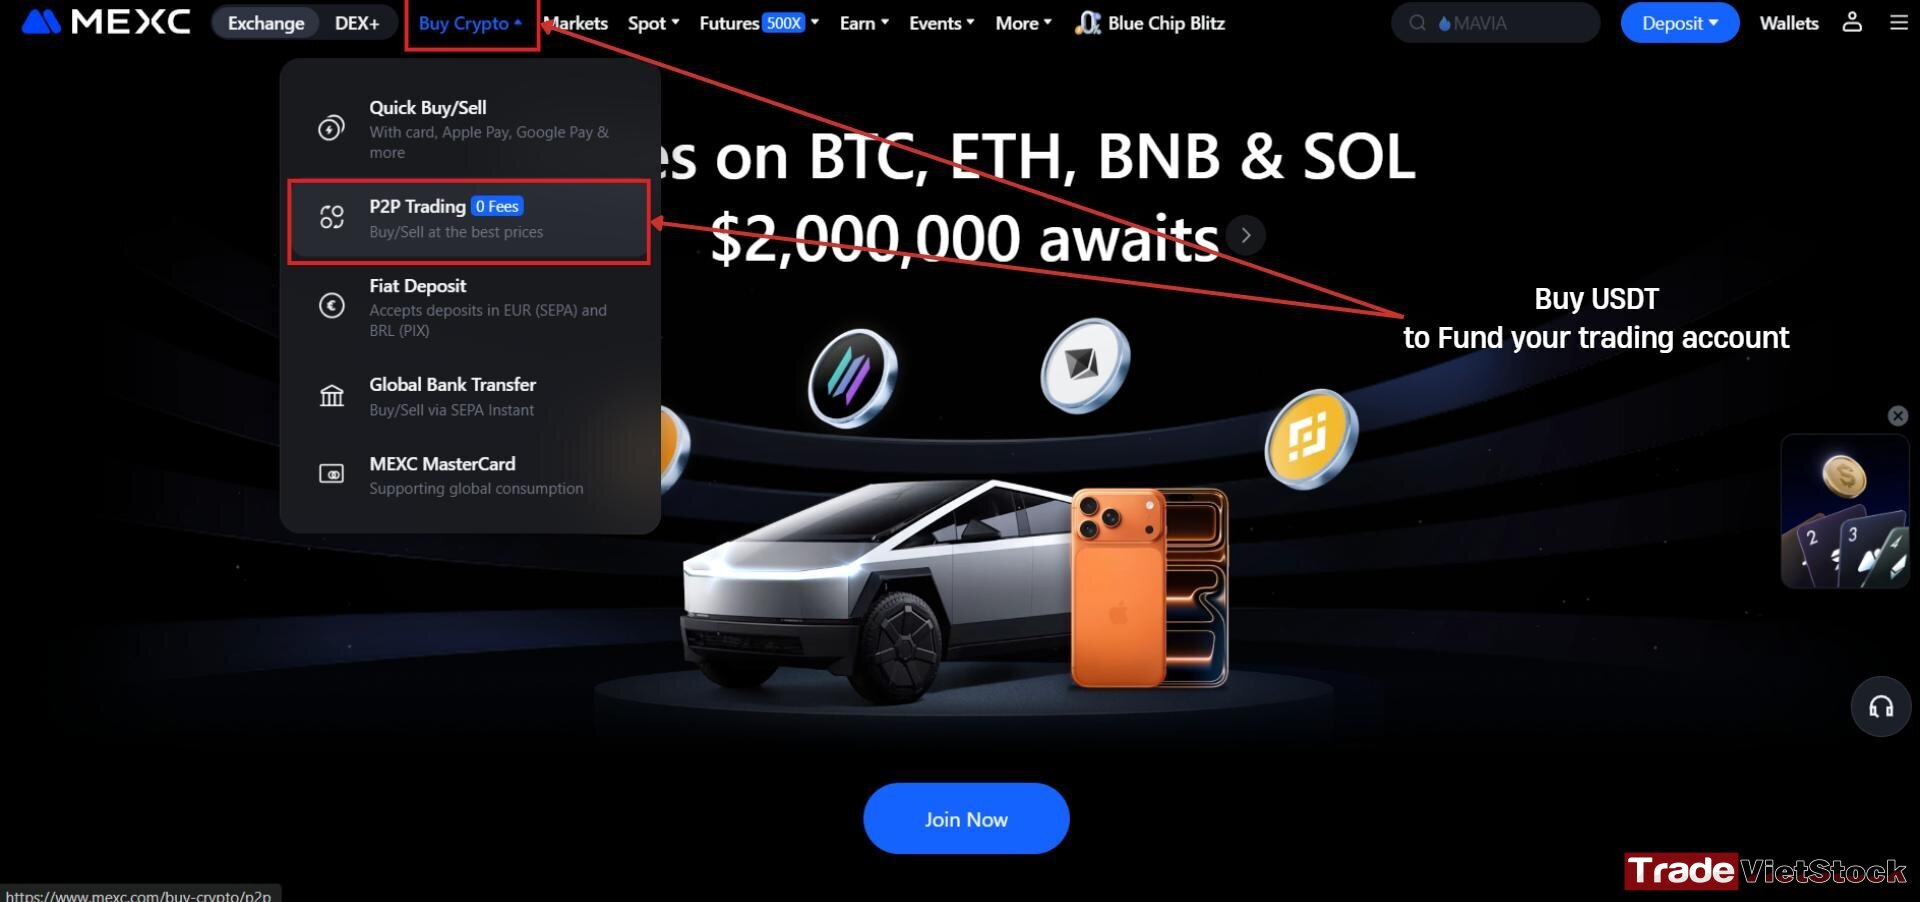
Step 1: Go to the P2P Zone
On the top menu, click “Buy Crypto” and select “P2P Trading.” You’re looking for USDT, as that’s the “digital dollar” you’ll use to buy other coins like Bitcoin or Ethereum.
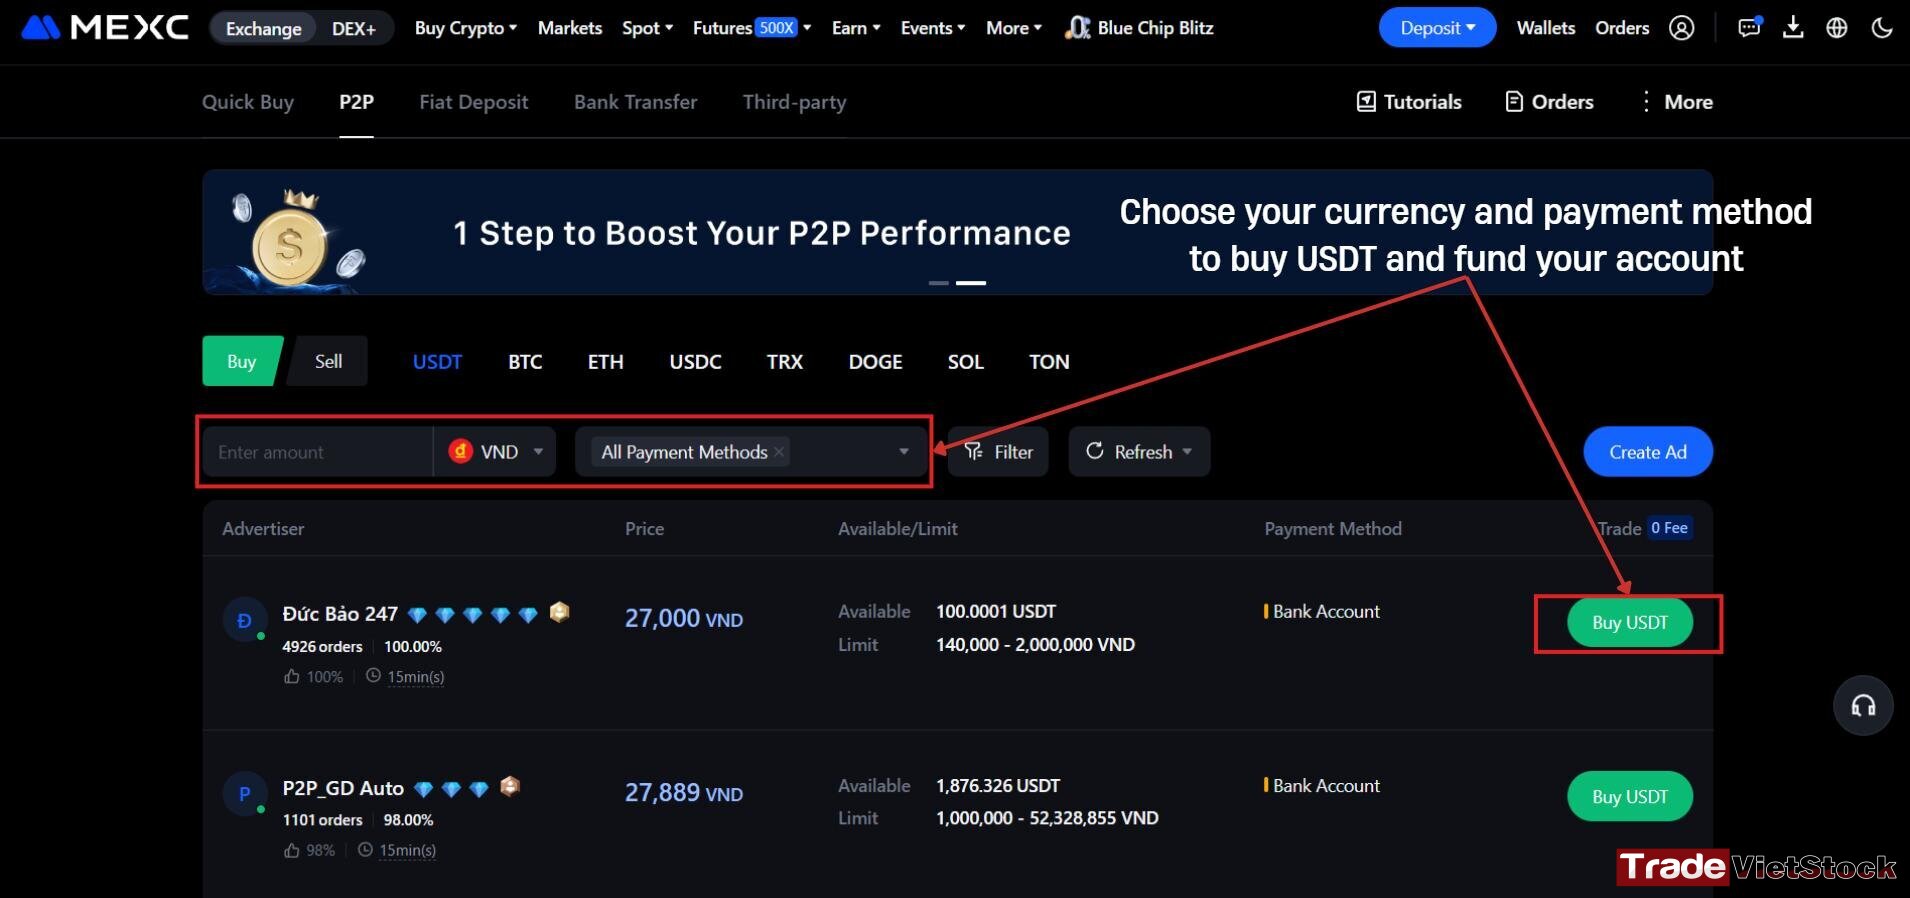
Step 2: Filter for Your Currency
Select your local currency (like VND, USD, or EUR) and choose your preferred payment method—Bank Transfer is usually the most reliable and has the lowest fees.
Step 3: Don’t just pick the first person you see
This is where you need to be a little smart. Before you click “Buy,” look at the seller’s stats:
- Completion Rate: Aim for someone with 95% or higher.
- Order Count: I usually stick with merchants who have done at least 500+ trades.
- The “Green Dot”: Make sure they are currently online so you aren’t waiting hours for them to release your coins.
Once you find a reputable seller, enter the amount you want to buy, follow their payment instructions, and hit “I have paid.” > A quick reminder: Never, ever click “I have paid” before you actually send the money. Likewise, once you’ve sent the payment, the seller is required by MEXC’s escrow to release your crypto. It’s a very safe process as long as you stay within the platform.
v. Ready to Trade?
And that’s all there is to it! You’ve gone from having no account to being fully verified and funded.
MEXC can feel a bit overwhelming at first because there are so many features, but my best advice is to start small. Use that initial bonus to get a feel for the interface, explore the different pairs, and maybe check out the “Kickstarter” events if you want to see how those airdrops work.
Trading is a journey, so take your time and don’t rush into high leverage right away. If you ran into any snags during the setup or want to see more walkthroughs on how to actually place your first trade, check out our Cryptocurrency Exchange Registration for more deep dives.
See you in the markets and happy trading!